编辑管理模块定义
在 KubeVela CLI (>= v1.1.0) 工具中,vela def 命令组为开发者提供了一系列便捷的 X-Definition 编写工具,使得 Definition 的编写将全部在 CUE 文件中进行,避免将 Template CUE 与 Kubernetes 的 YAML 格式进行混合,方便进行格式化与校验。
init
vela def init 是一个用来帮助用户初始化新的 Definition 的脚手架命令。用户可以通过 vela def init my-trait -t trait --desc "My trait description." 来创建一个新的空白 TraitDefinition ,如下
"my-trait": {
        annotations: {}
        attributes: {
                appliesToWorkloads: []
                conflictsWith: []
                definitionRef:   ""
                podDisruptive:   false
                workloadRefPath: ""
        }
        description: "My trait description."
        labels: {}
        type: "trait"
}
template: patch: {}
或者是采用 vela def init my-comp --interactive 来交互式地创建新的 Definition 。
$ vela def init my-comp --interactive
Please choose one definition type from the following values: component, trait, policy, workload, scope, workflow-step
> Definition type: component
> Definition description: My component definition.
Please enter the location the template YAML file to build definition. Leave it empty to generate default template.
> Definition template filename:
Please enter the output location of the generated definition. Leave it empty to print definition to stdout.
> Definition output filename: my-component.cue
Definition written to my-component.cue
除此之外,如果用户创建 ComponentDefinition 的目的是一个 Deployment(或者是其他的 Kubernetes Object ),而这个 Deployment 已经有了 YAML 格式的模版,用户还可以通过 --template-yaml 参数来完成从 YAML 到 CUE 的自动转换。例如如下的 my-deployment.yaml
apiVersion: apps/v1
kind: Deployment
metadata:
  name: hello-world
spec:
  replicas: 1
  selector:
    matchLabels:
      app.kubernetes.io/name: hello-world
  template:
    metadata:
      labels:
        app.kubernetes.io/name: hello-world
    spec:
      containers:
      - name: hello-world
        image: somefive/hello-world
        ports:
        - name: http
          containerPort: 80
          protocol: TCP
---
apiVersion: v1
kind: Service
metadata:
  name: hello-world-service
spec:
  selector:
    app: hello-world
  ports:
  - name: http
    protocol: TCP
    port: 80
    targetPort: 8080
  type: LoadBalancer
运行 vela def init my-comp -t component --desc "My component." --template-yaml ./my-deployment.yaml 可以得到 CUE 格式的 ComponentDefinition
"my-comp": {
        annotations: {}
        attributes: workload: definition: {
                apiVersion: "<change me> apps/v1"
                kind:       "<change me> Deployment"
        }
        description: "My component."
        labels: {}
        type: "component"
}
template: {
        output: {
                metadata: name: "hello-world"
                spec: {
                        replicas: 1
                        selector: matchLabels: "app.kubernetes.io/name": "hello-world"
                        template: {
                                metadata: labels: "app.kubernetes.io/name": "hello-world"
                                spec: containers: [{
                                        name:  "hello-world"
                                        image: "somefive/hello-world"
                                        ports: [{
                                                name:          "http"
                                                containerPort: 80
                                                protocol:      "TCP"
                                        }]
                                }]
                        }
                }
                apiVersion: "apps/v1"
                kind:       "Deployment"
        }
        outputs: "hello-world-service": {
                metadata: name: "hello-world-service"
                spec: {
                        ports: [{
                                name:       "http"
                                protocol:   "TCP"
                                port:       80
                                targetPort: 8080
                        }]
                        selector: app: "hello-world"
                        type: "LoadBalancer"
                }
                apiVersion: "v1"
                kind:       "Service"
        }
        parameter: {}
}
接下来,用户就可以在该文件的基础上进一步做进一步的修改了。比如将属性中对于 workload.definition 中的 \<change me> 去掉。
vet
在初始化 Definition 文件之后,可以运行 vela def vet my-comp.cue 来校验 Definition 是否在语法上有错误。比如如果少写了一个括号,该命令能够帮助用户识别出来。
$ vela def vet my-comp.cue
Validation succeed.
render / apply
确认 Definition 撰写无误后,开发者可以运行 vela def apply my-comp.cue --namespace my-namespace 来将该 Definition 应用在 Kubernetes 的 my-namespace 命名空间中。如果想了解一下 CUE 格式的 Definition 文件会被渲染成什么样的 Kubernetes YAML 文件,可以使用 vela def apply my-comp.cue --dry-run 或者 vela def render my-comp.cue -o my-comp.yaml 来预先渲染一下 YAML 文件进行确认。
apiVersion: core.oam.dev/v1beta1
kind: ComponentDefinition
metadata:
  annotations:
    definition.oam.dev/description: My component.
  labels: {}
  name: my-comp
  namespace: vela-system
spec:
  schematic:
    cue:
      template: |
        output: {
                metadata: name: "hello-world"
                spec: {
                        replicas: 1
                        selector: matchLabels: "app.kubernetes.io/name": "hello-world"
                        template: {
                                metadata: labels: "app.kubernetes.io/name": "hello-world"
                                spec: containers: [{
                                        name:  "hello-world"
                                        image: "somefive/hello-world"
                                        ports: [{
                                                name:          "http"
                                                containerPort: 80
                                                protocol:      "TCP"
                                        }]
                                }]
                        }
                }
                apiVersion: "apps/v11"
                kind:       "Deployment"
        }
        outputs: "hello-world-service": {
                metadata: name: "hello-world-service"
                spec: {
                        ports: [{
                                name:       "http"
                                protocol:   "TCP"
                                port:       80
                                targetPort: 8080
                        }]
                        selector: app: "hello-world"
                        type: "LoadBalancer"
                }
                apiVersion: "v1"
                kind:       "Service"
        }
        parameter: {}
  workload:
    definition:
      apiVersion: apps/v1
      kind: Deployment
$ vela def apply my-comp.cue -n my-namespace
ComponentDefinition my-comp created in namespace my-namespace.
get / list / edit / del
在 apply 命令后,开发者可以采用原生的 kubectl 来对结果进行确认,但是正如我们上文提到的,YAML 格式的结果会相对复杂。使用 vela def get 命令可以自动将其转换成 CUE 格式,方便用户查看。
$ vela def get my-comp -t component
或者用户可以通过 vela def list 命令来查看当前系统中安装的所有 Definition(可以指定命名空间及类型)。
$ vela def list -n my-namespace -t component
NAME                    TYPE                    NAMESPACE       DESCRIPTION
my-comp                 ComponentDefinition     my-namespace    My component.
同样的,在使用 vela def edit 命令来编辑 Definition 时,用户也只需要对转换过的 CUE 格式 Definition 进行修改,该命令会自动完成格式转换。用户也可以通过设定环境变量 EDITOR 来使用自己想要使用的编辑器。
$ EDITOR=vim vela def edit my-comp
类似的,用户可以运行 vela def del 来删除相应的 Definition。
$ vela def del my-comp -n my-namespace
Are you sure to delete the following definition in namespace my-namespace?
ComponentDefinition my-comp: My component.
[yes|no] > yes
ComponentDefinition my-comp in namespace my-namespace deleted.
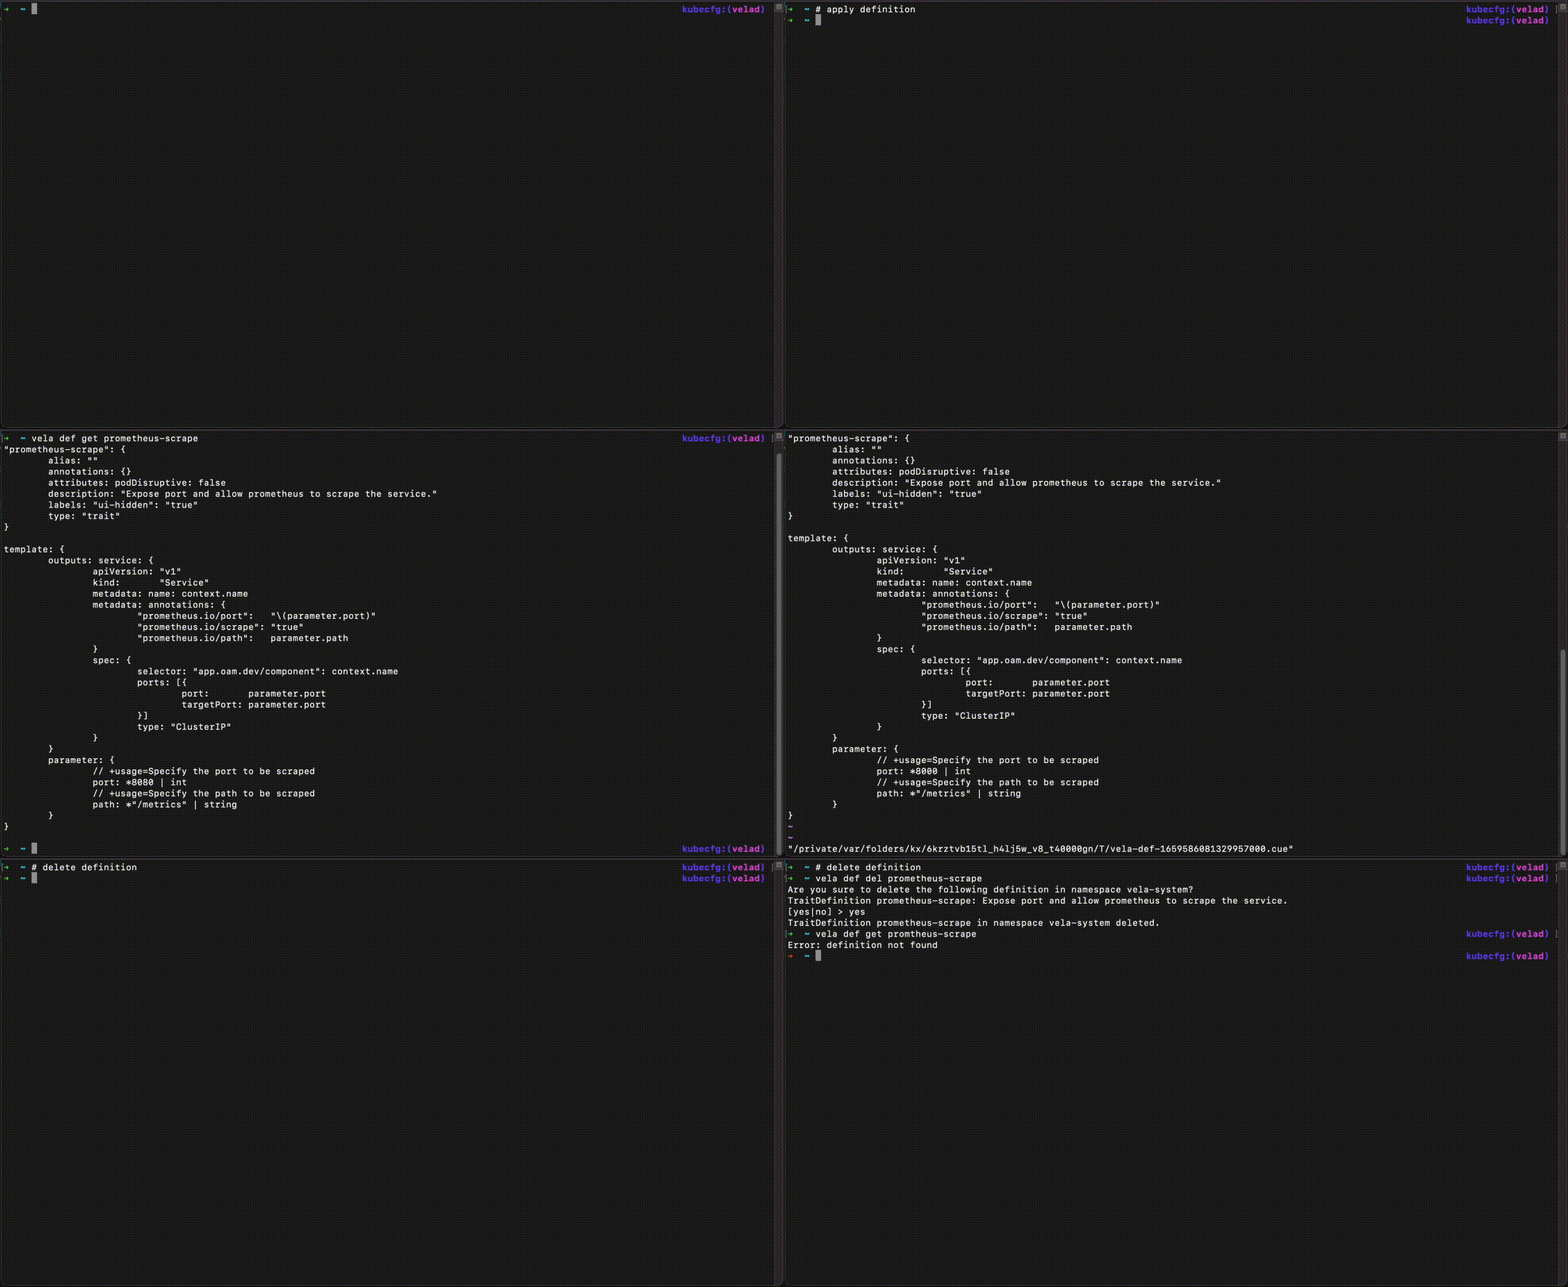
下图简单展示了如何使用vela def命令来操作管理 Definition。
