SSO Login
Description
In KubeVela V1.3, we provide two methods to log in: local login and SSO.
Local login uses the username and password stored in the local database to log in, and SSO integrates Dex, which can be configured by configuring Dex's OpenID Connect to implement many different ways to log in, such as GitHub, LDAP, Gitlab, OIDC, SAML, Google etc.
After the platform is initialized, local login is used by default. Platform administrators can configure SSO through the platform configuration page. In this tutorial, we'll use GitHub and LDAP Connector to show how to use SSO with KubeVela.
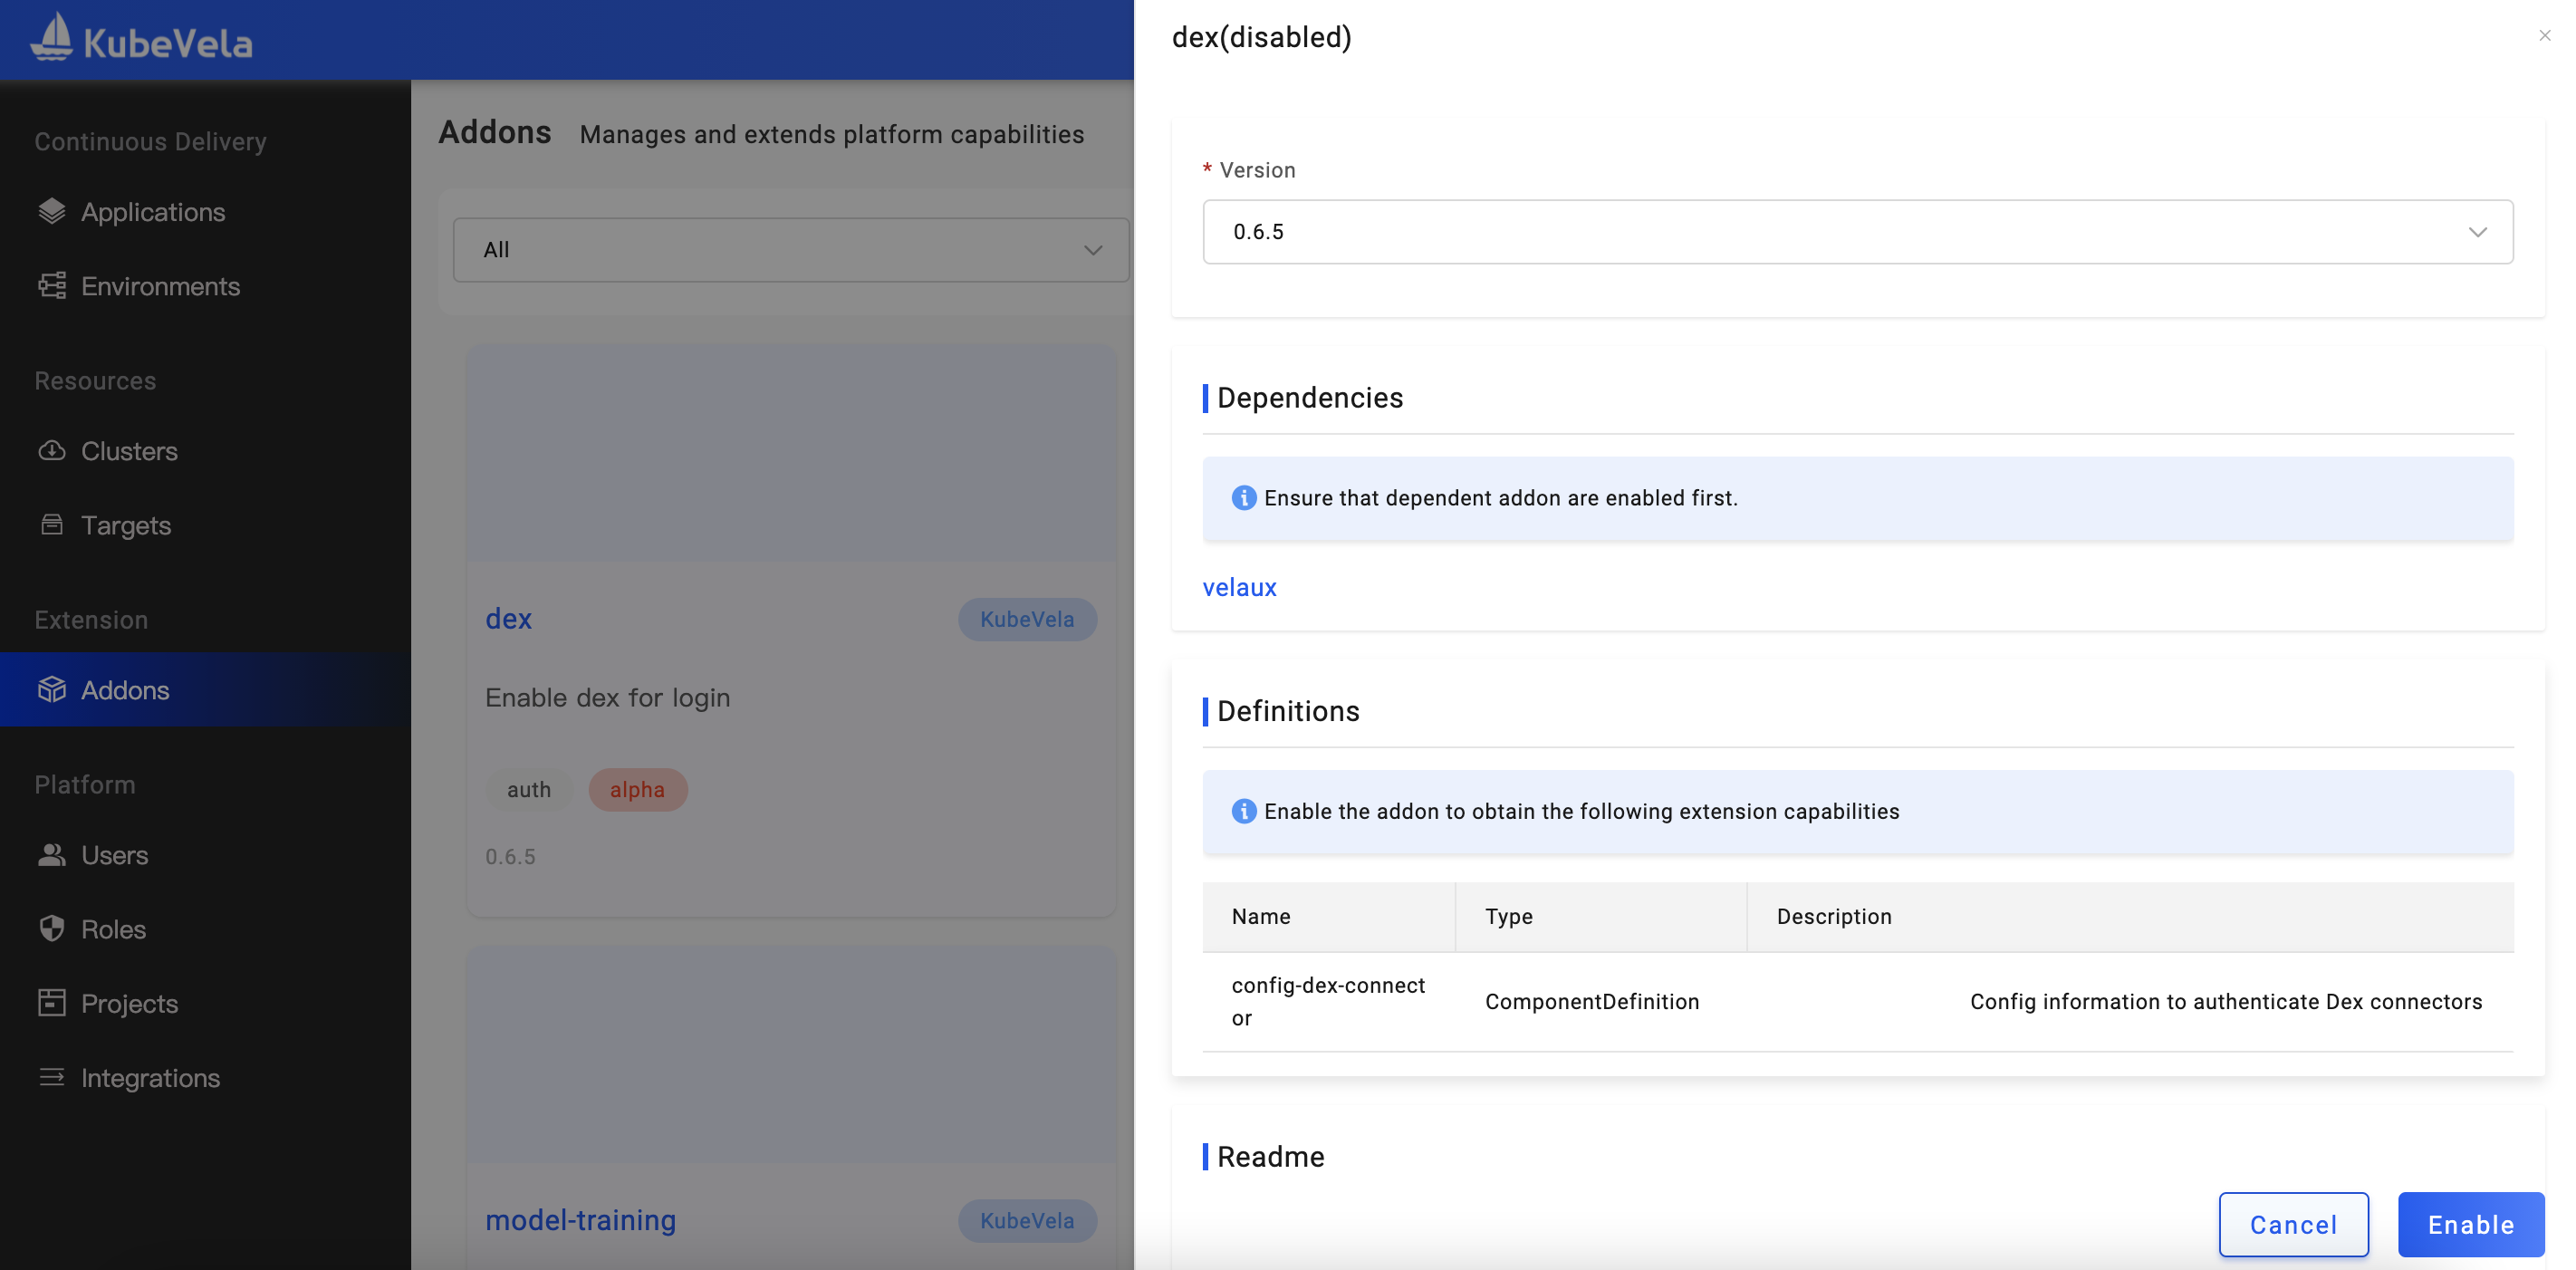
Enable Dex Addon
- You need to enable the Dex Addon in the Addon list first to use SSO:
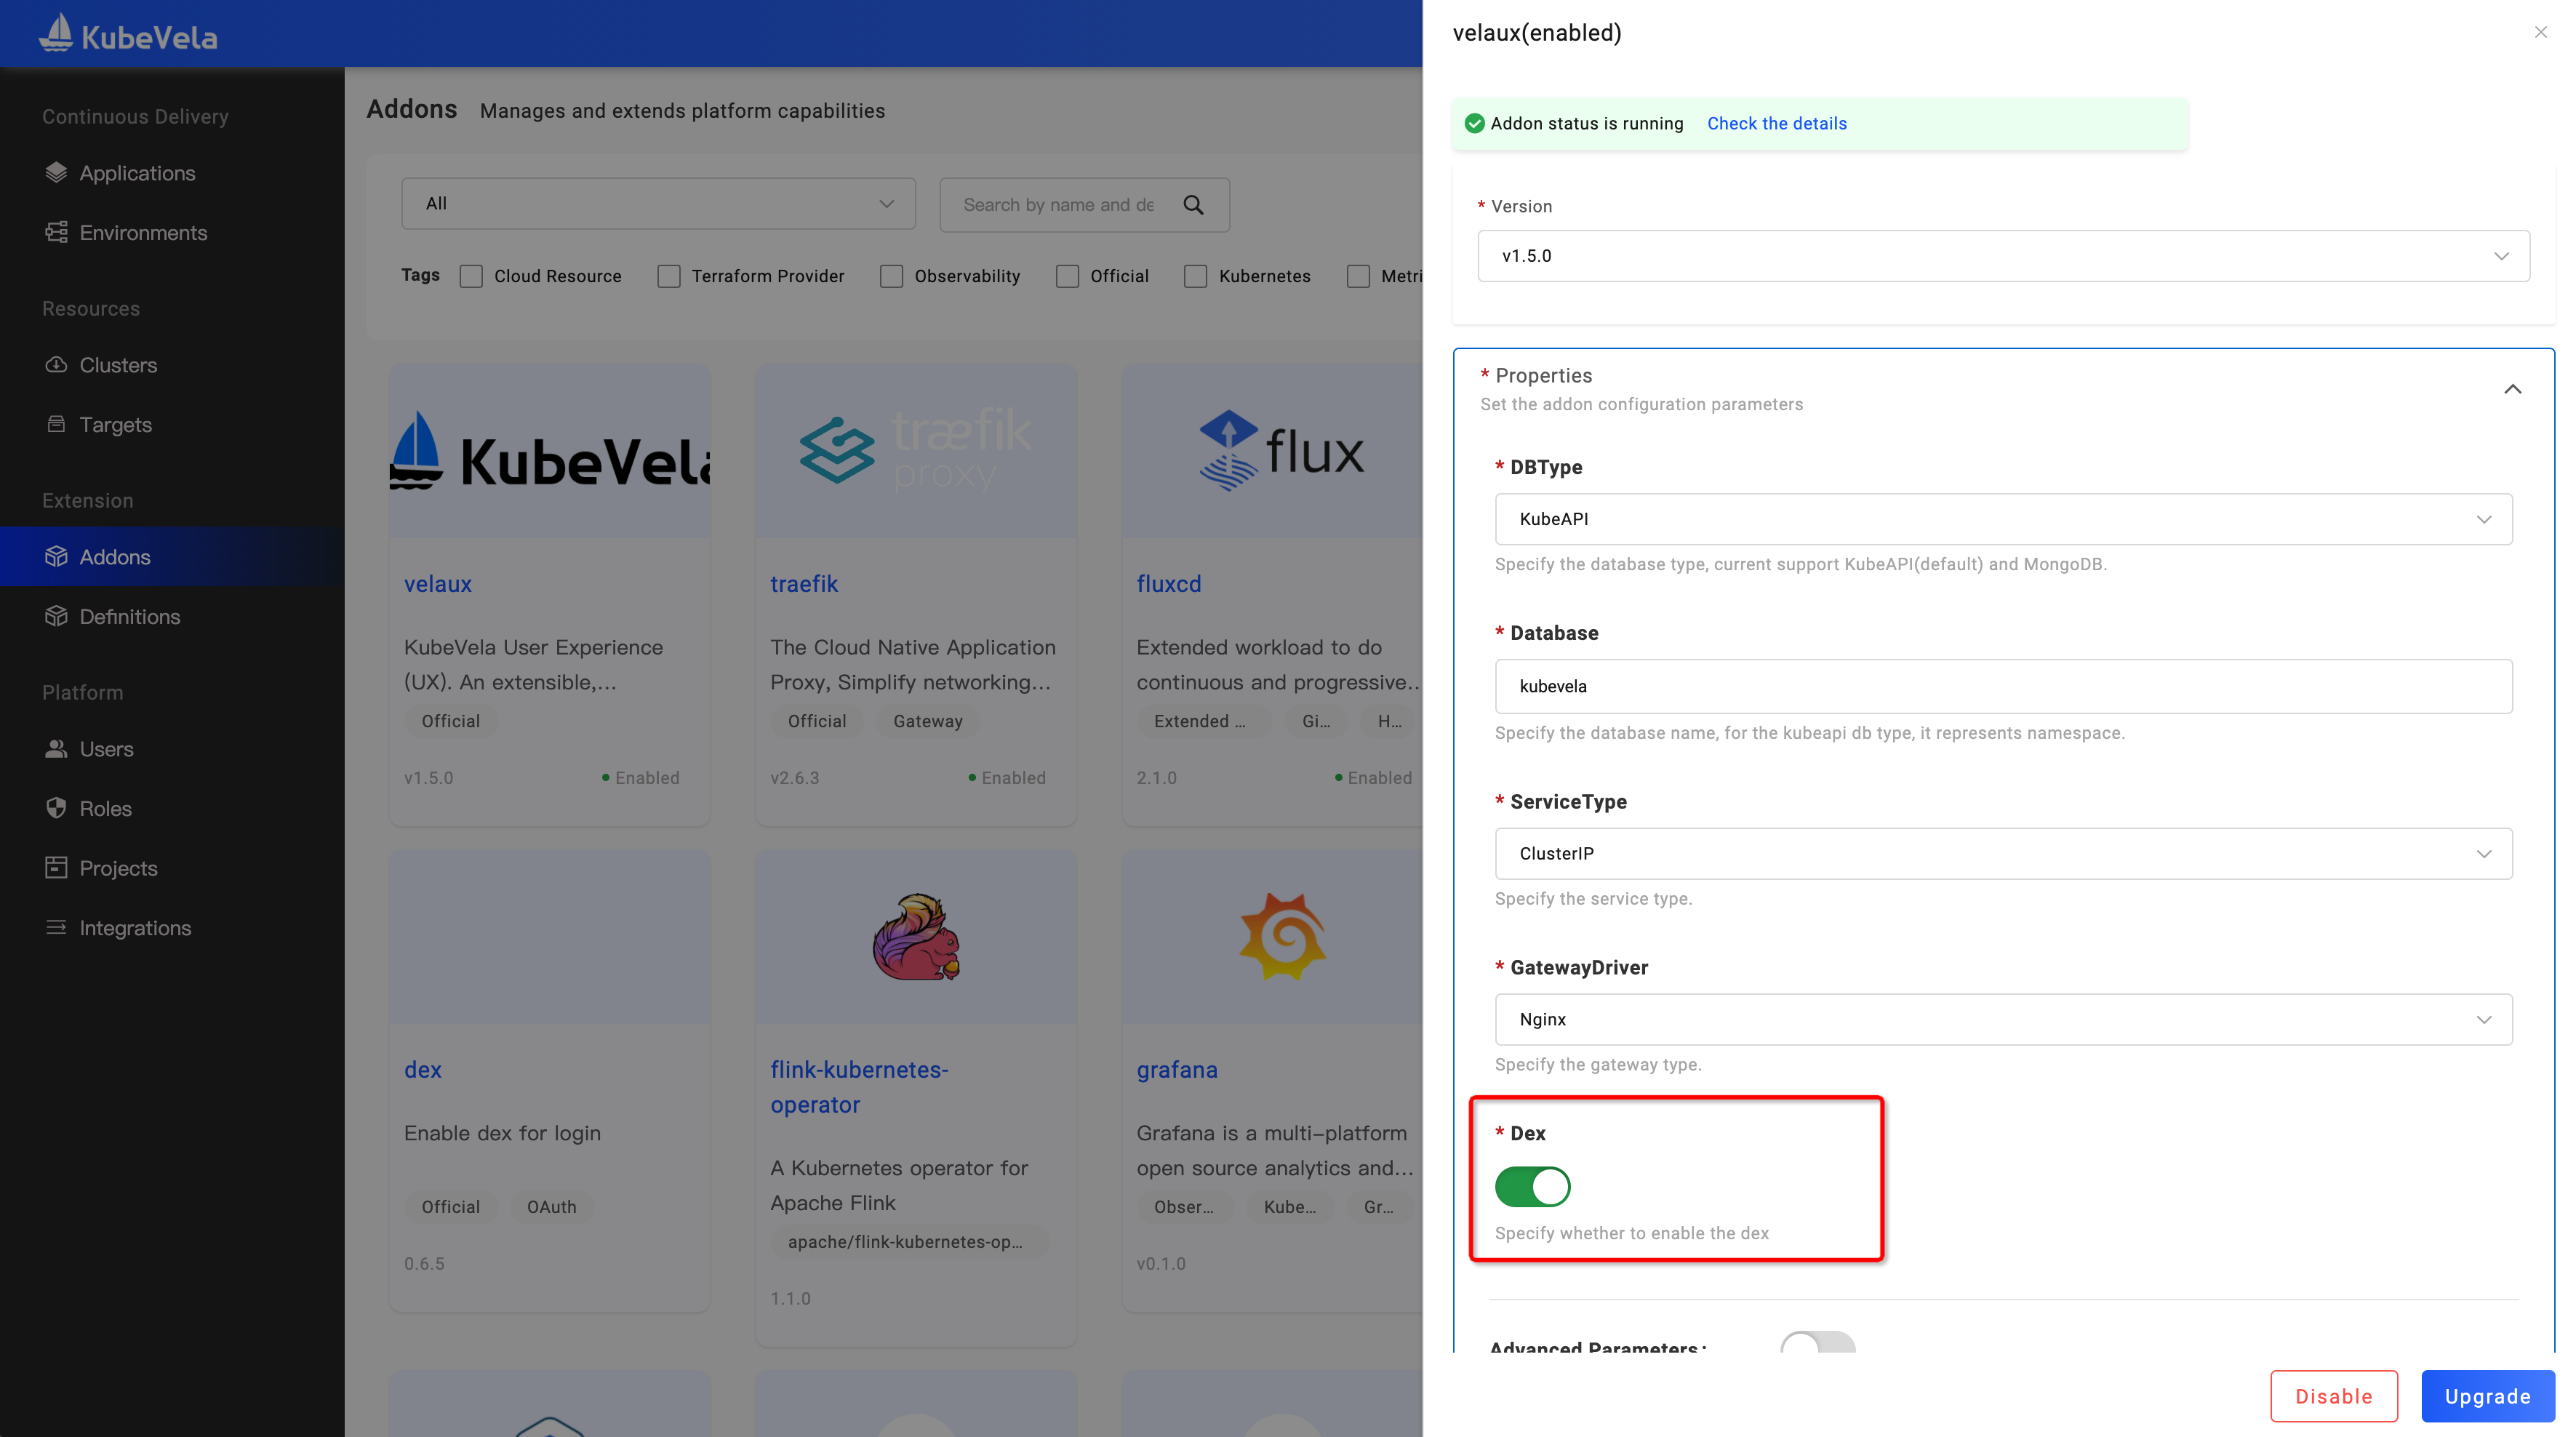
- After enabling the Dex Addon, we also need to upgrade the VelaUX addon and open its Dex option:
Configure Dex Connectors
Next, we need to configure the Dex Connectors.
Configure GitHub Connector
Take GitHub Connector as an example, if you don't have a GitHub Oauth App, you need to create an OAuth App on GitHub's Developer settings first, and set the App's Authorization callback URL to [Vela UX address]/dex/callback.
Note that please make sure your Vela UX has a public IP address due to third-party redirection involved.
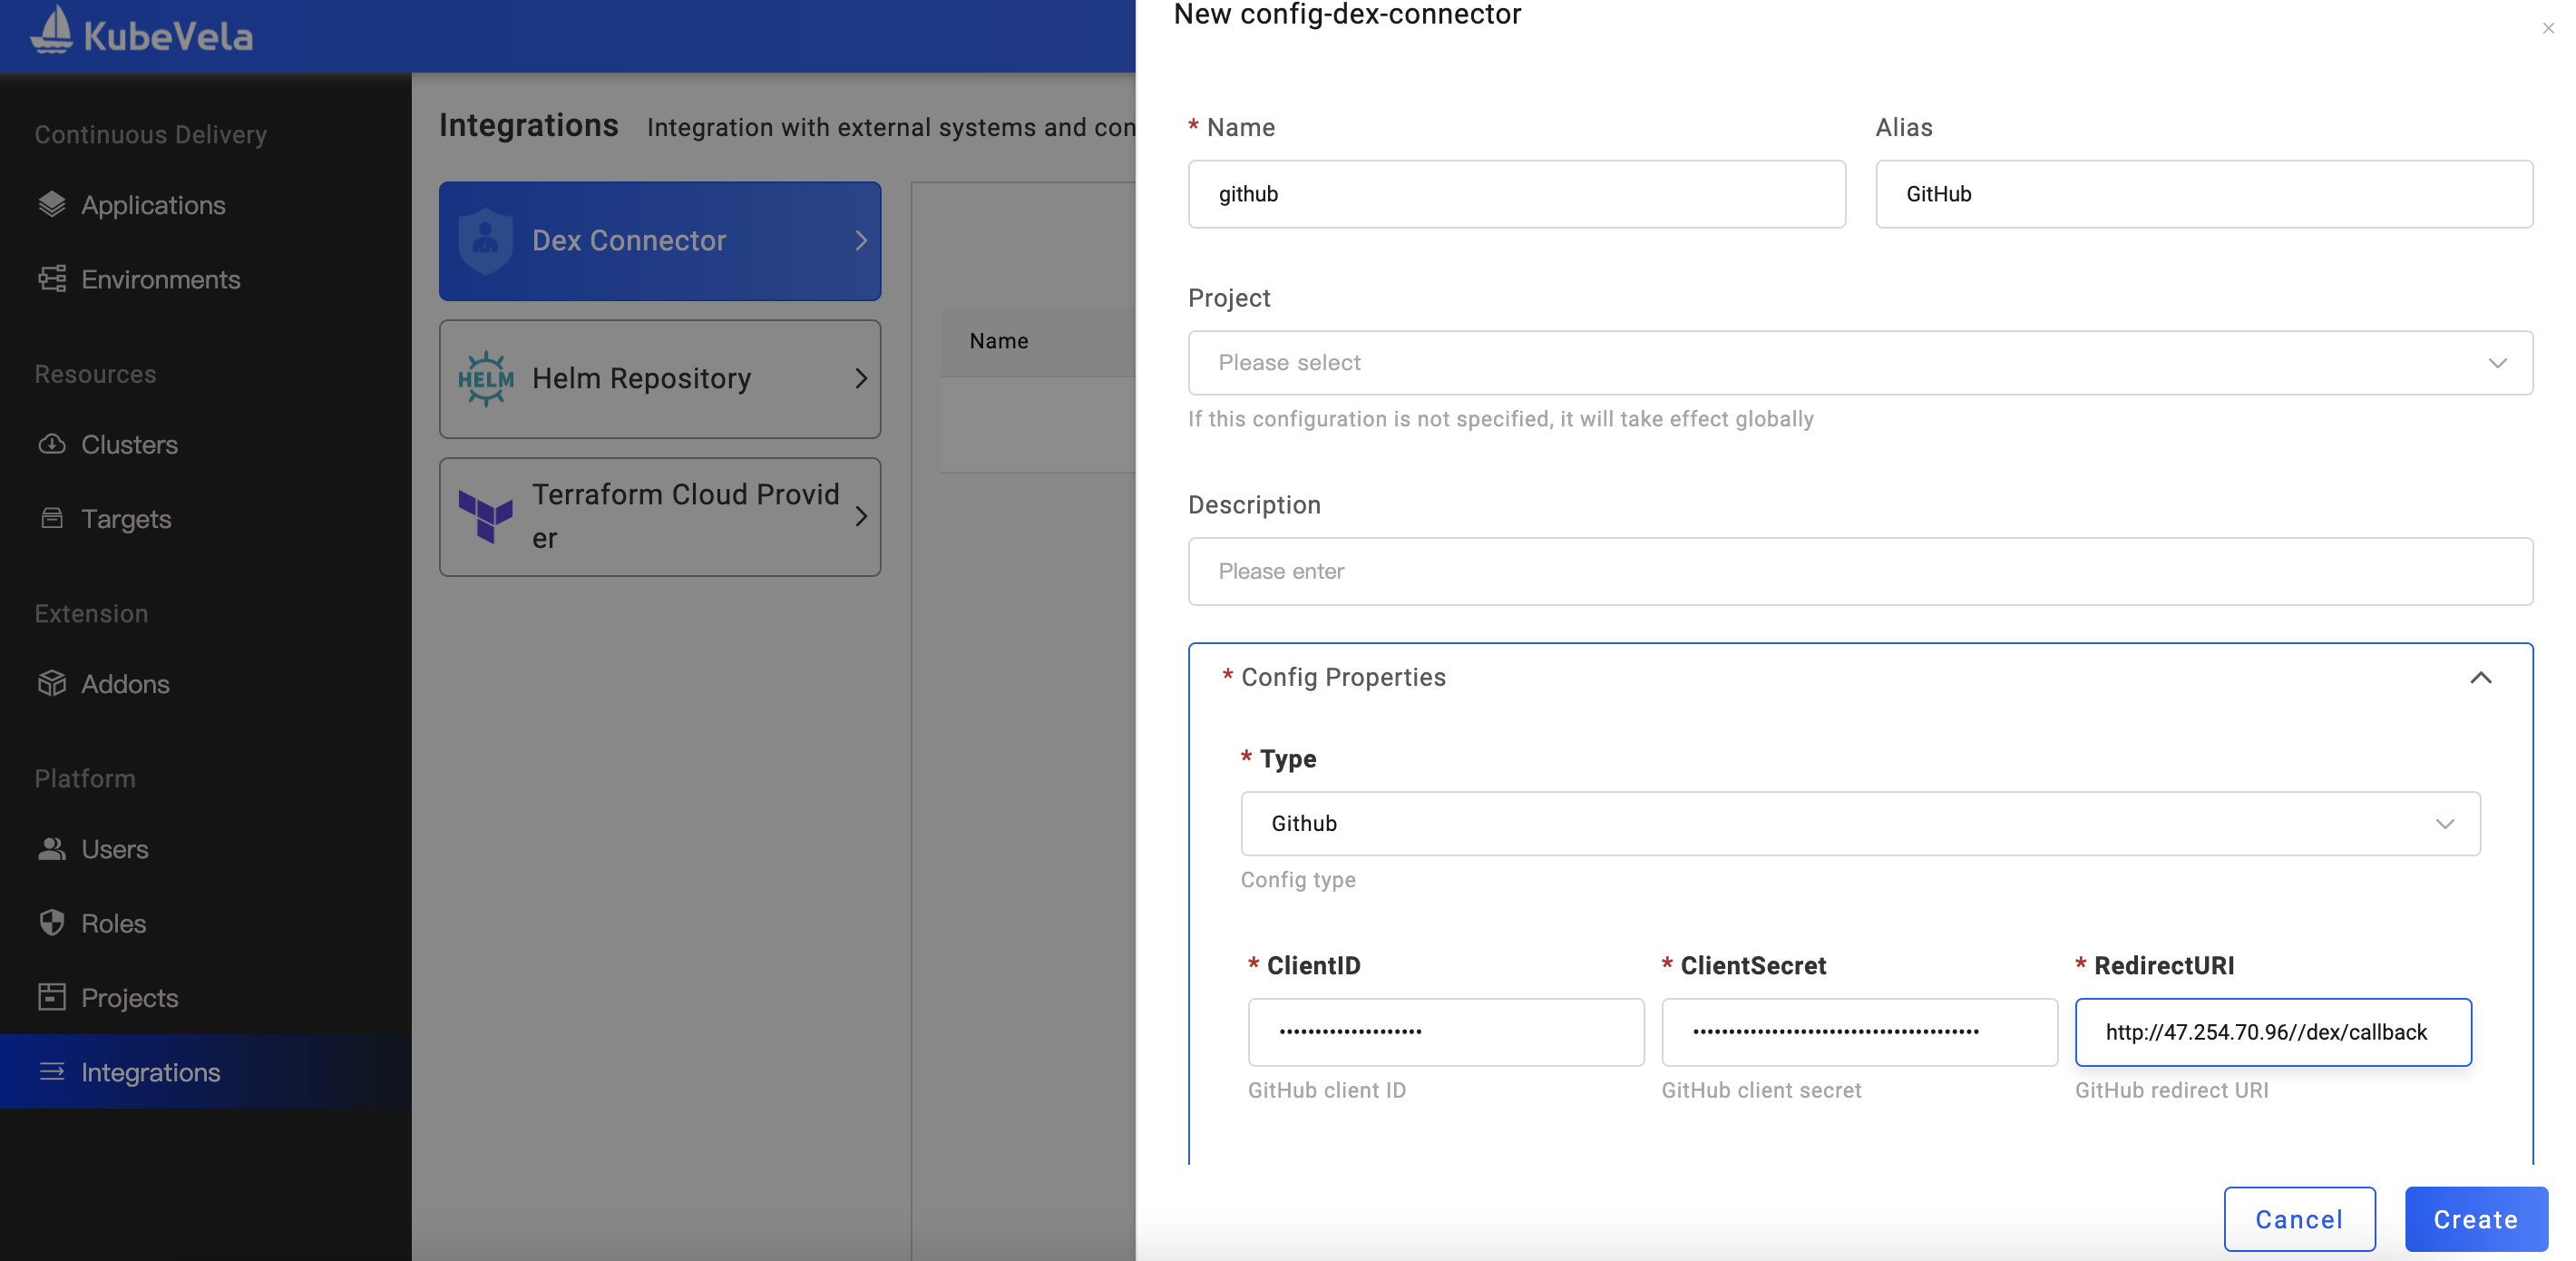
After creating the Oauth App, configure the Dex Connector on the integration configuration page. We choose the type GitHub, and set the Client ID and Client Secret corresponding to the Oauth App. Note that the Redirect URI here must be the same as the [Vela UX address]/dex/callback previously configured when the Oauth App was created.
Configure LDAP Connector
If you want to use LDAP for SSO, you need to set up the LDAP Connector first.
Before configuring, please make sure you have LDAP installed correctly and that LDAP can communicate with the Vela UX network.
After selecting the Connector type as LDAP, fill in the address of the LDAP server in Host, and specify BaseDN.
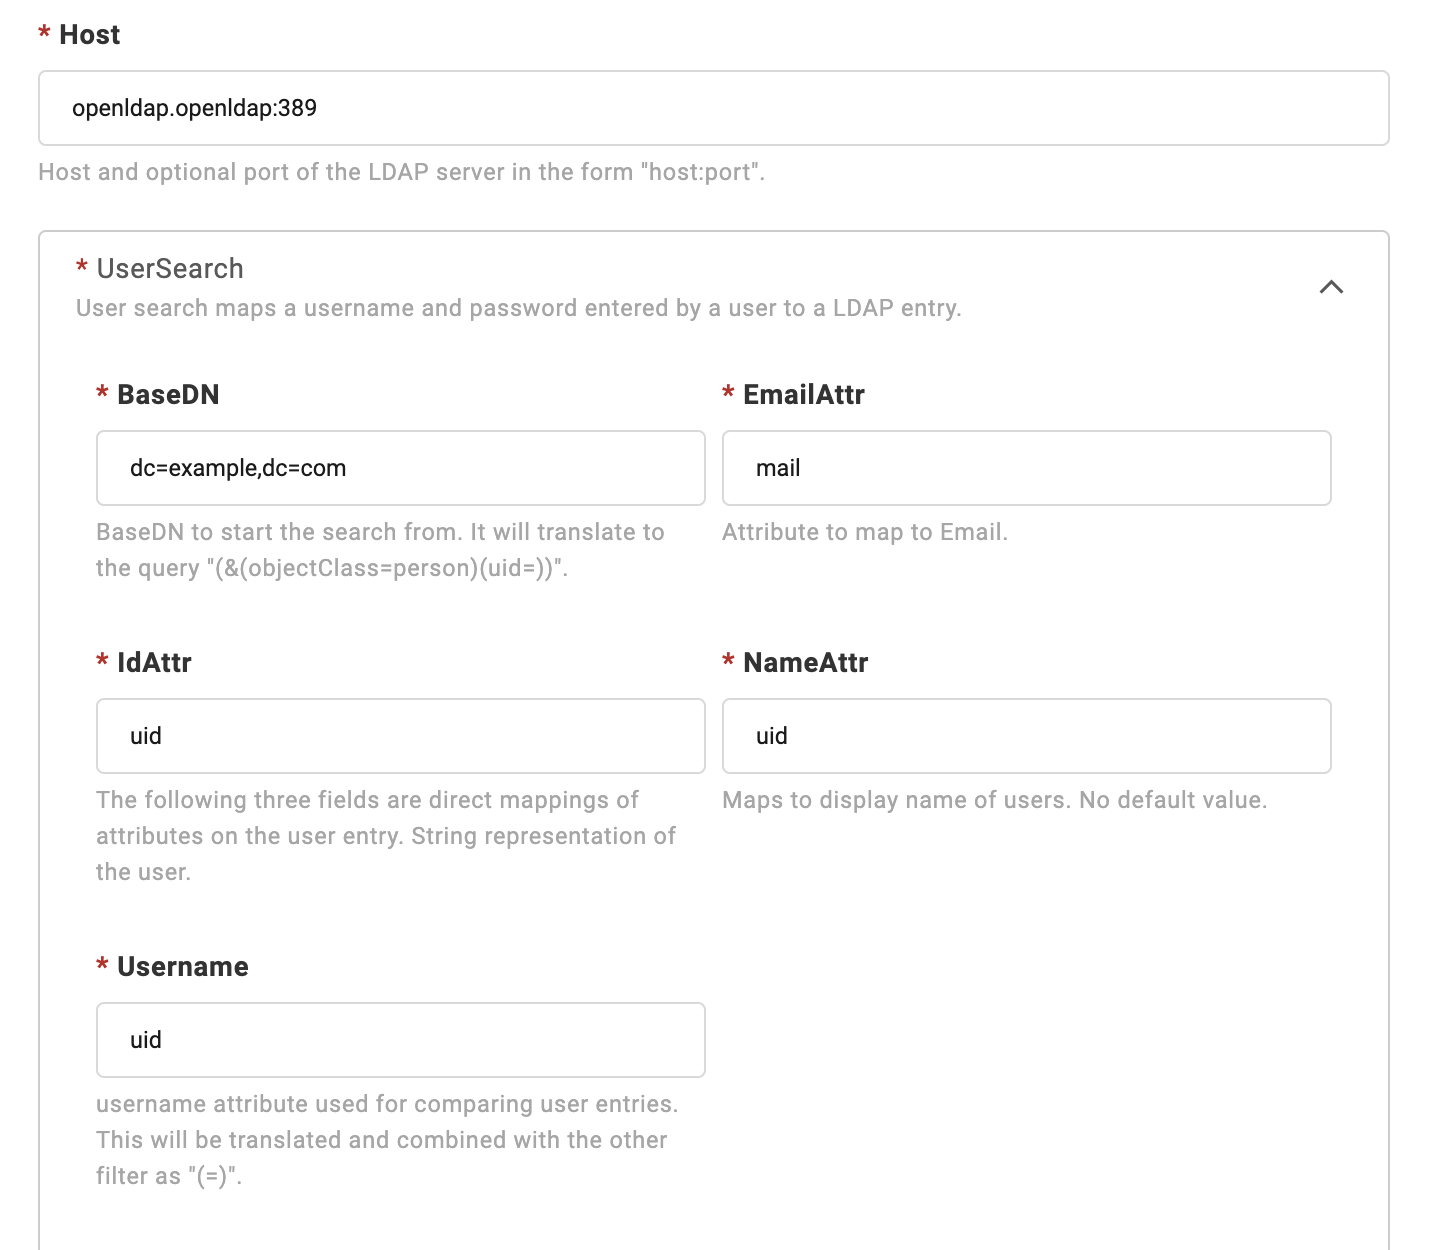
If your LDAP does not provide anonymous authentication access, then you need to open the Advanced Parameters, fill in BindDN and BindPW, Connector will use these credentials for user search.

For more types of Dex Connectors, please refer to Dex Connectors Configuration.
Platform setting
Users who logged in through SSO will be automatically bound to the users who have the same email in the local database, otherwise, a new user will be created.
Since the newly logged-in user does not have any permissions, we need to set an email address for the platform administrator first. After that, when you use a user with the same email address for SSO login, you can automatically have platform administrator privileges.
The admin user also could log in from the dex with the email and password.
After configuring the user email, we can change the login method to SSO login on the platform configuration page. Before updating the configuration, it is strongly recommended to click Click me to test open the dex page to verify that the dex connector configuration is ready.
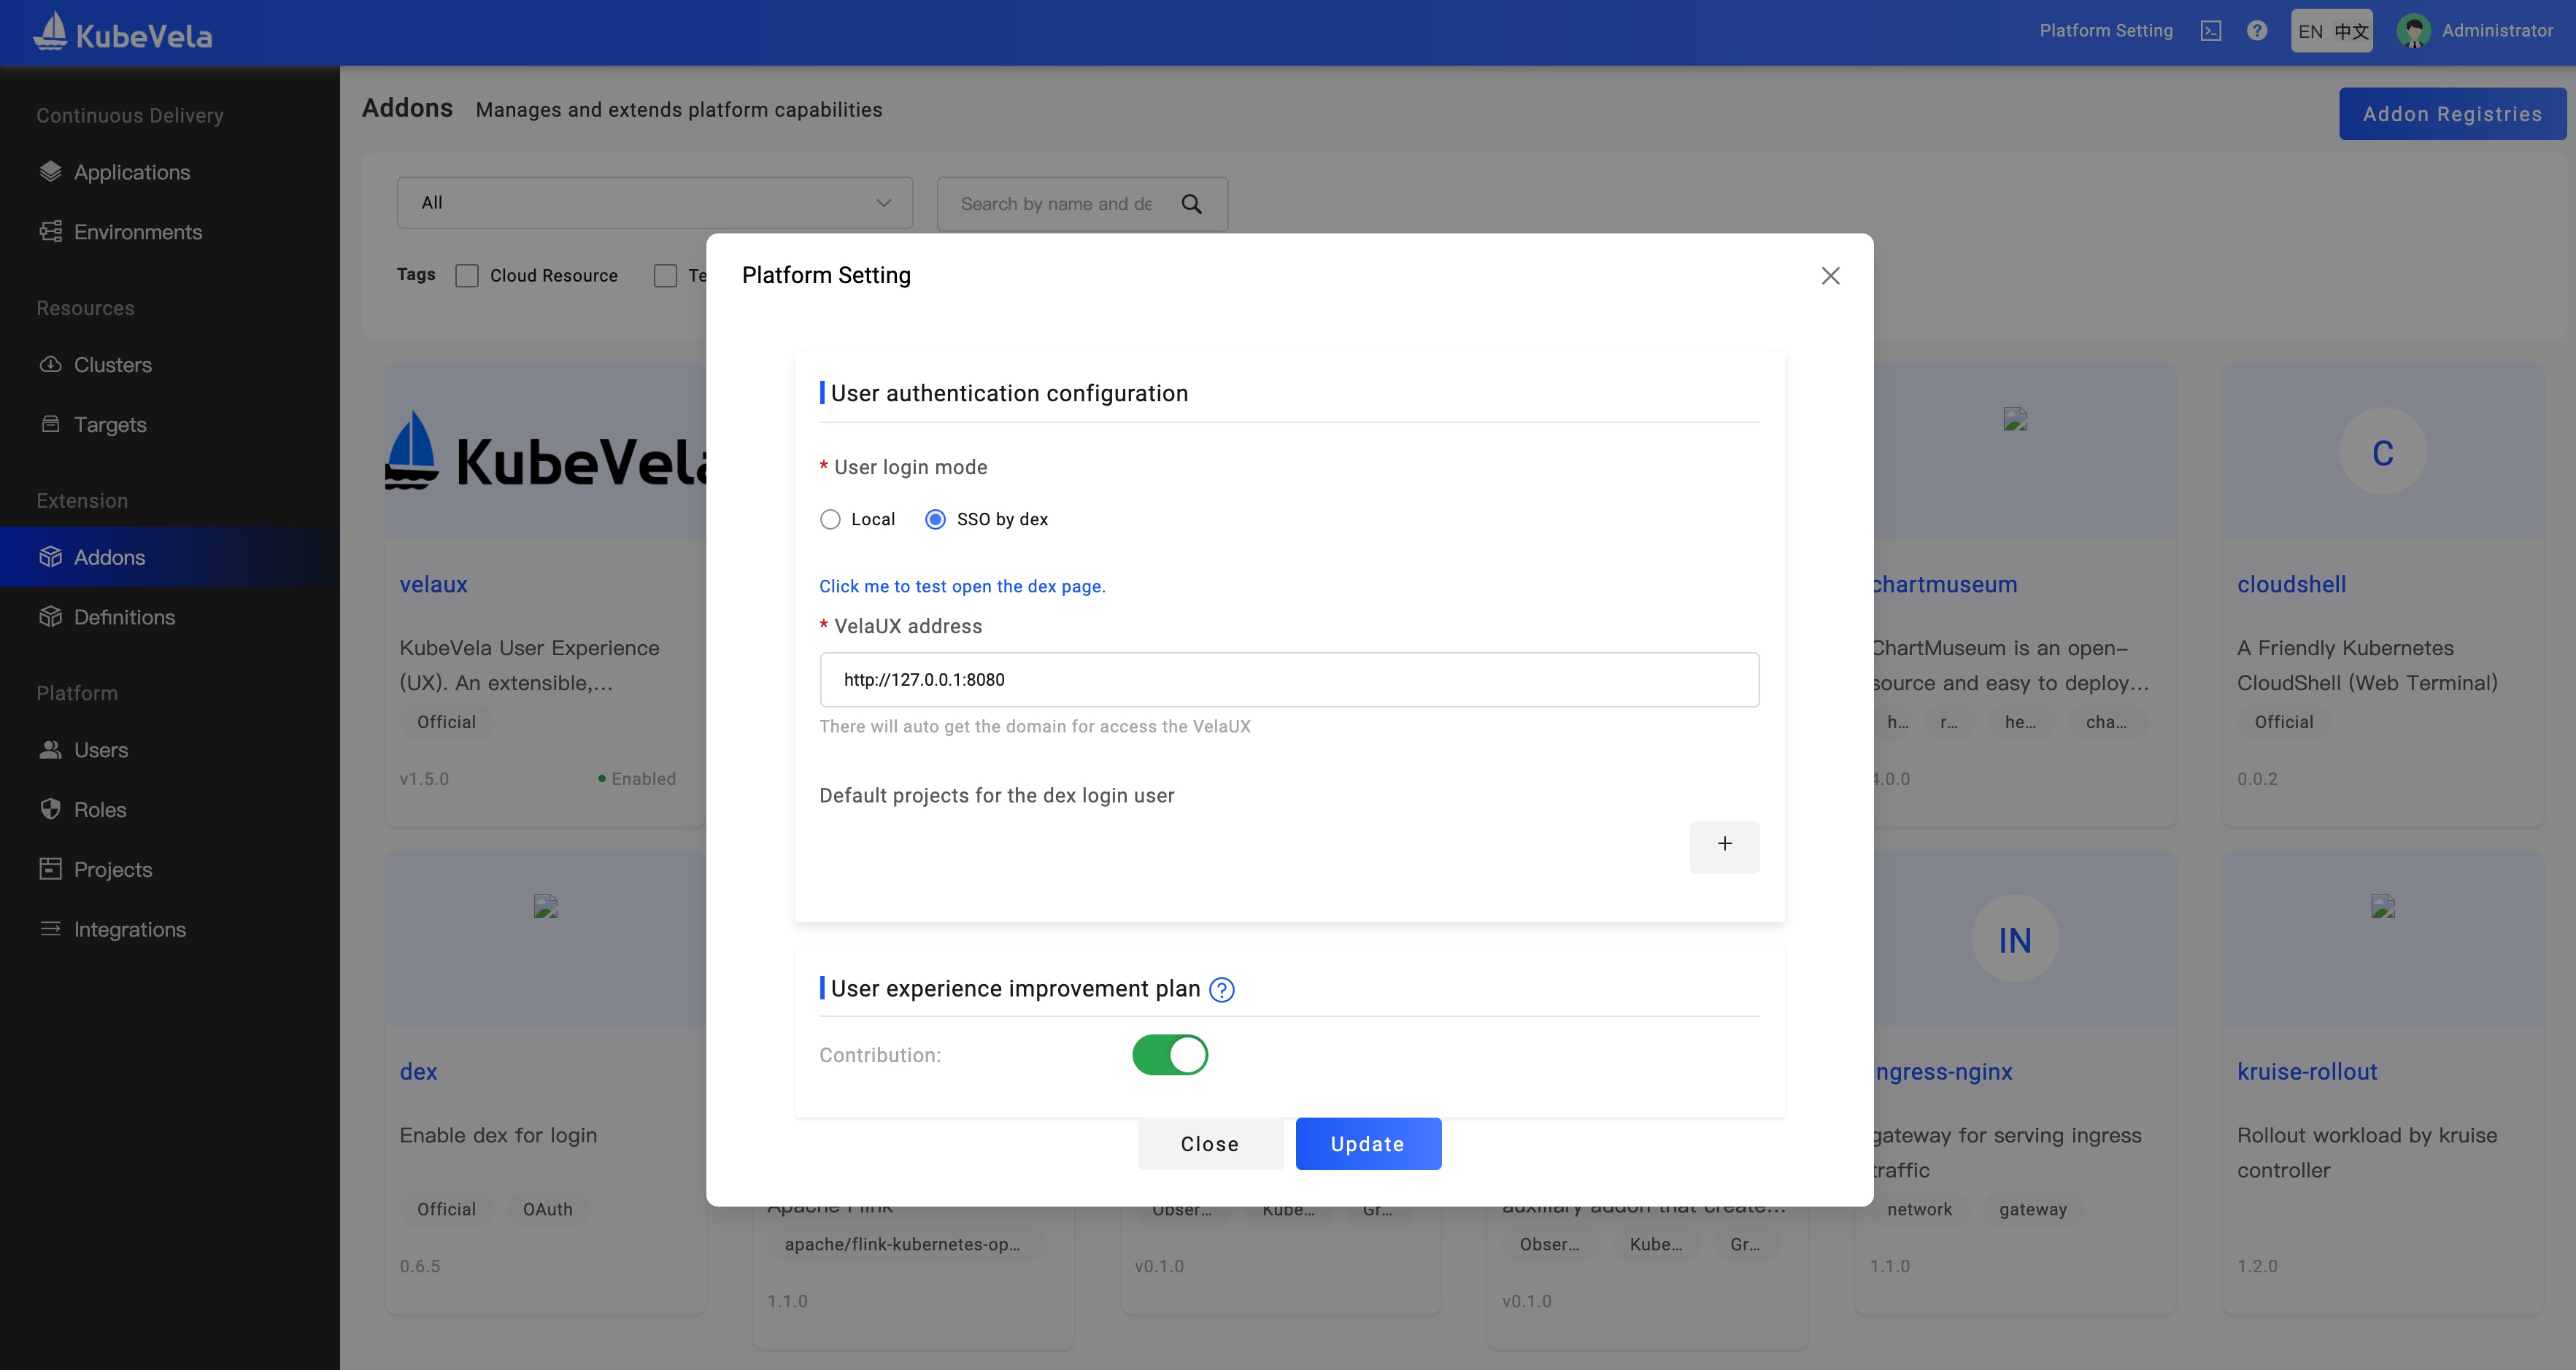
On this page, you could set the default project and roles for the users who log in through SSO.
Use SSO Login
Log out and refresh the page again, you can see that we have entered the Dex login page.
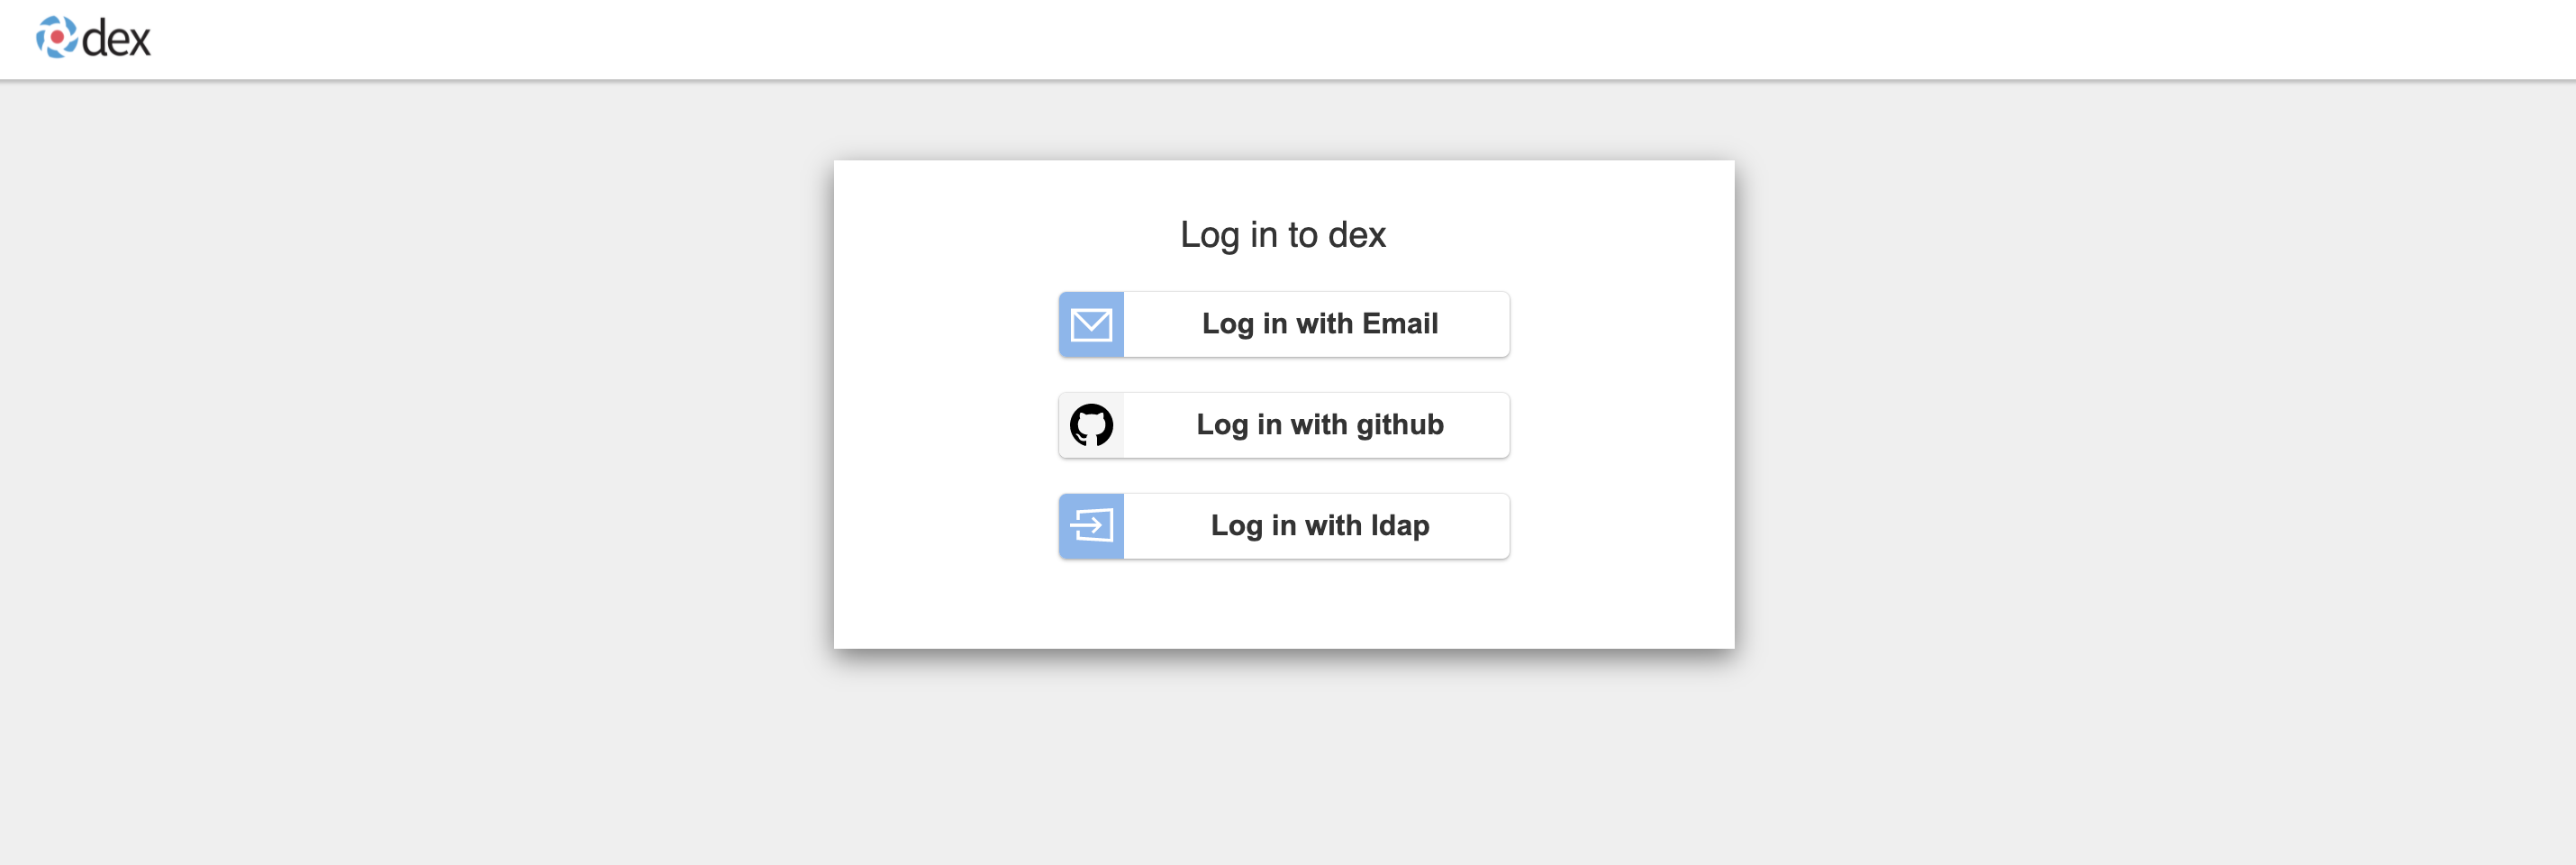
Then, you select GitHub or LDAP to log in.
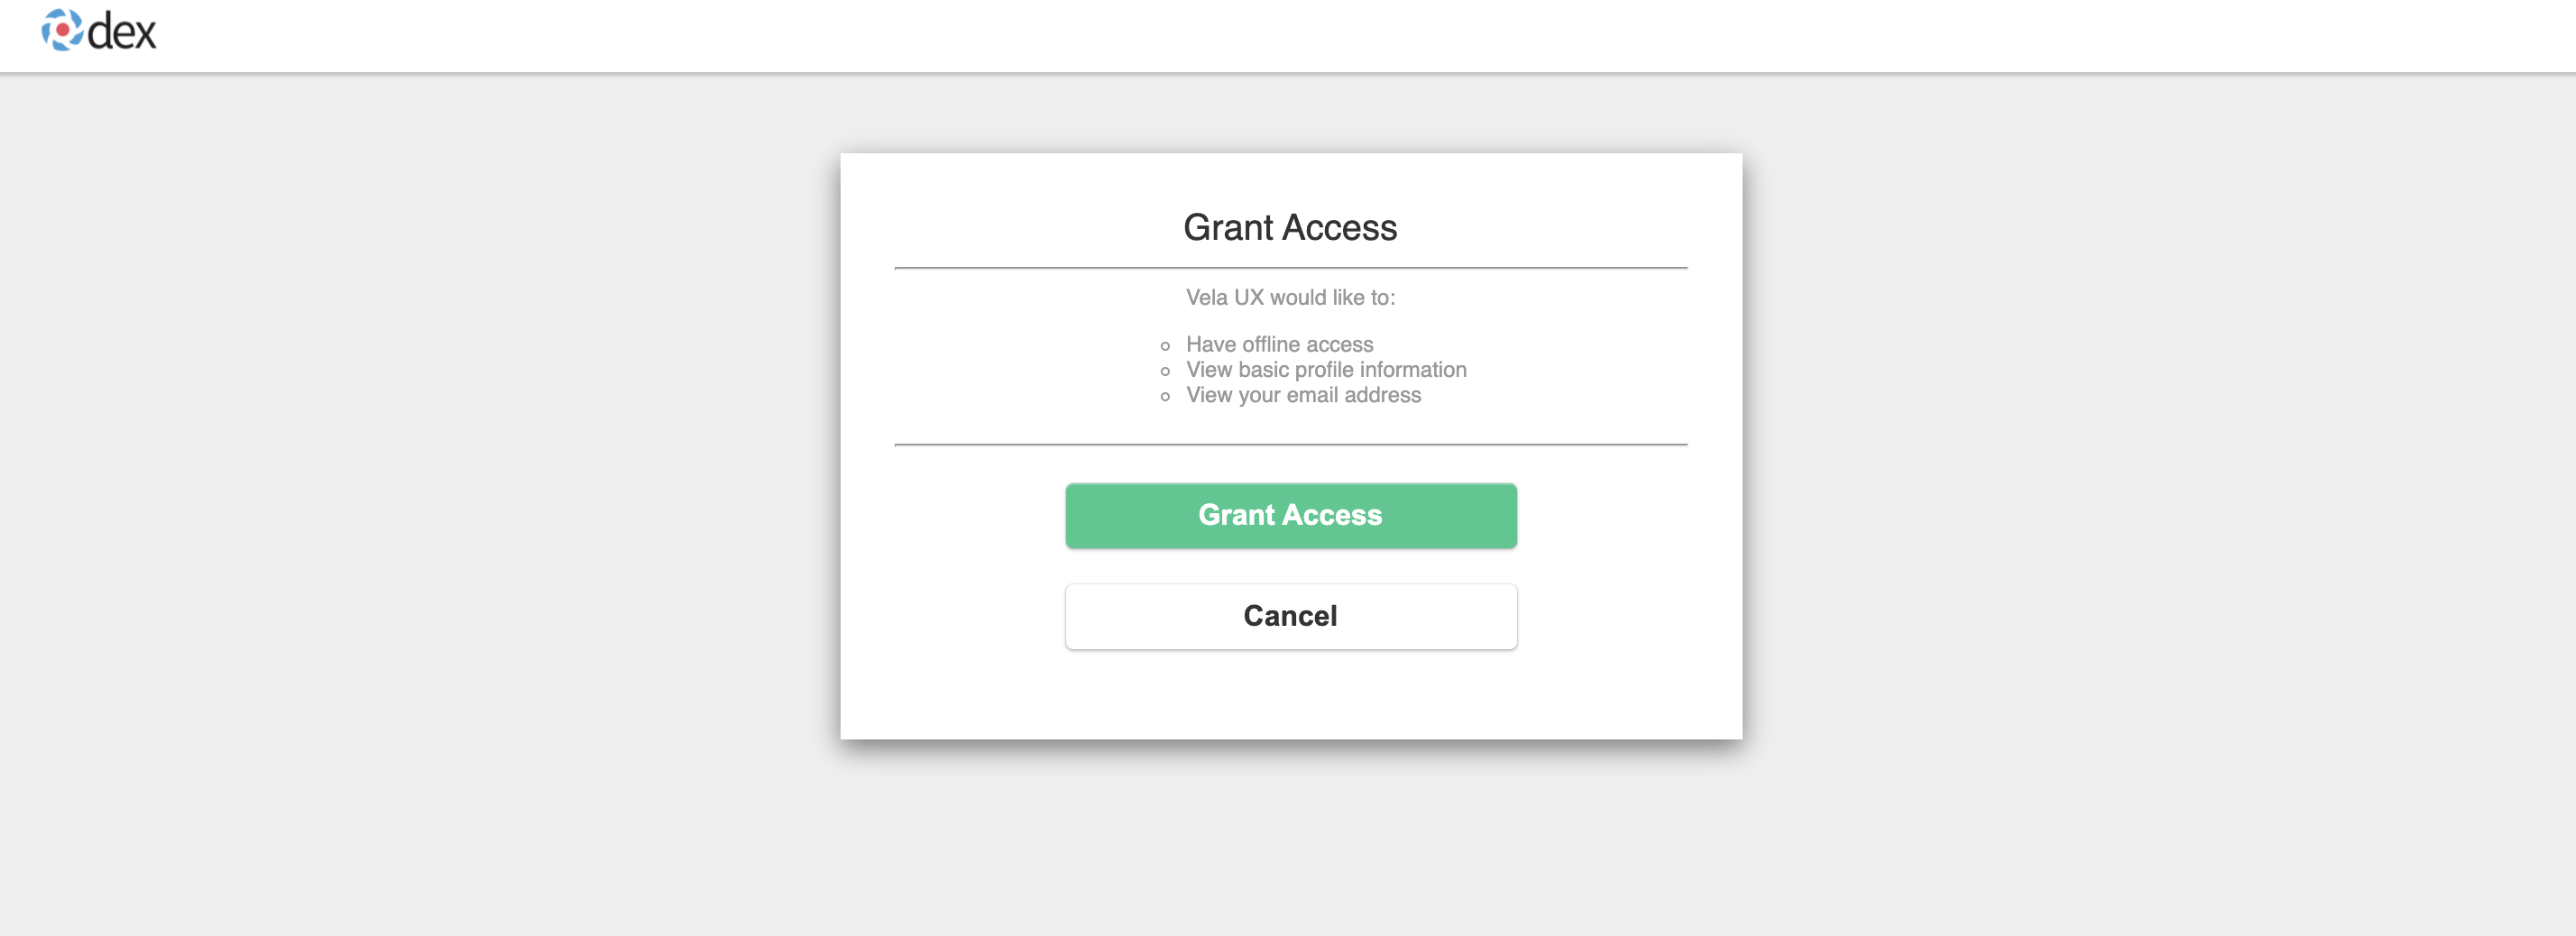
So far, we have completed SSO login with GitHub. At this point, if the email of the log-in user can be associated with the email of the previously log-in user, the newly log-in user will inherit the permissions of the previous user.