Deploy Kubernetes Objects
This section introduces that how you can deploy Kubernetes objects into multi environments and clusters.
KubeVela supports you to render, orchestrate and deploy Kubernetes objects. The common usage type is Deployment+Service. Using customized Workflow, you can deploy an application into multi-cluster in sequence. Hence you'll get to know:
- Deploy Kubernetes objects.
- Workflow and its usage.
- Multi-env/cluster in application delivery.
- The control loop of application deployment: Rollback, Terminate and Continue.
Before starting
- Prepare a Deployment+Service yaml config resource.
Scheduling and creating Targets
Target defines the namespace in runtime cluster for application delivery. Once Target created, namespace in runtime cluster created accordingly.
Clicking New Target into the creating process. Type in necessary Infos as Project, Cluster, Namespace to create. We create targets for 2 clusters. We create targets for 2 clusters. If you only have 1 cluster you can also use its namespaces to create several targets. For now, we at least give it to 3 Targets: 1 for test and 2 for prod environments.
Creating Kubernetes application
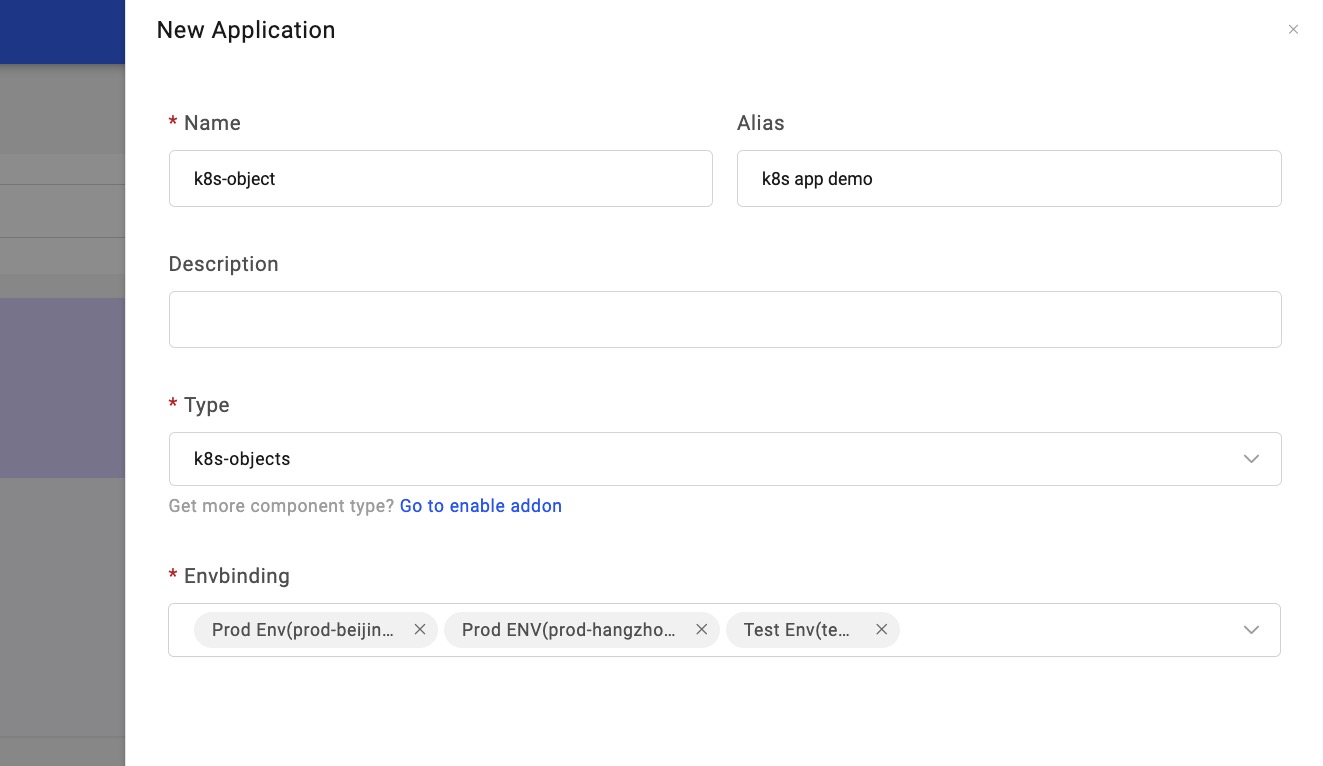
After Target was created, we begin to create an application. Same to Deploy First Application, we need to submit basic Infos:
(1) Select type: k8s-objects; NOTE that in one application please maintain at most one Workload type of resource, meaning without more than a Deployment or Statefulset.
(2) We schedule two environments, test and prod. Test environment links to the target for dev and prod environment select the other two targets.
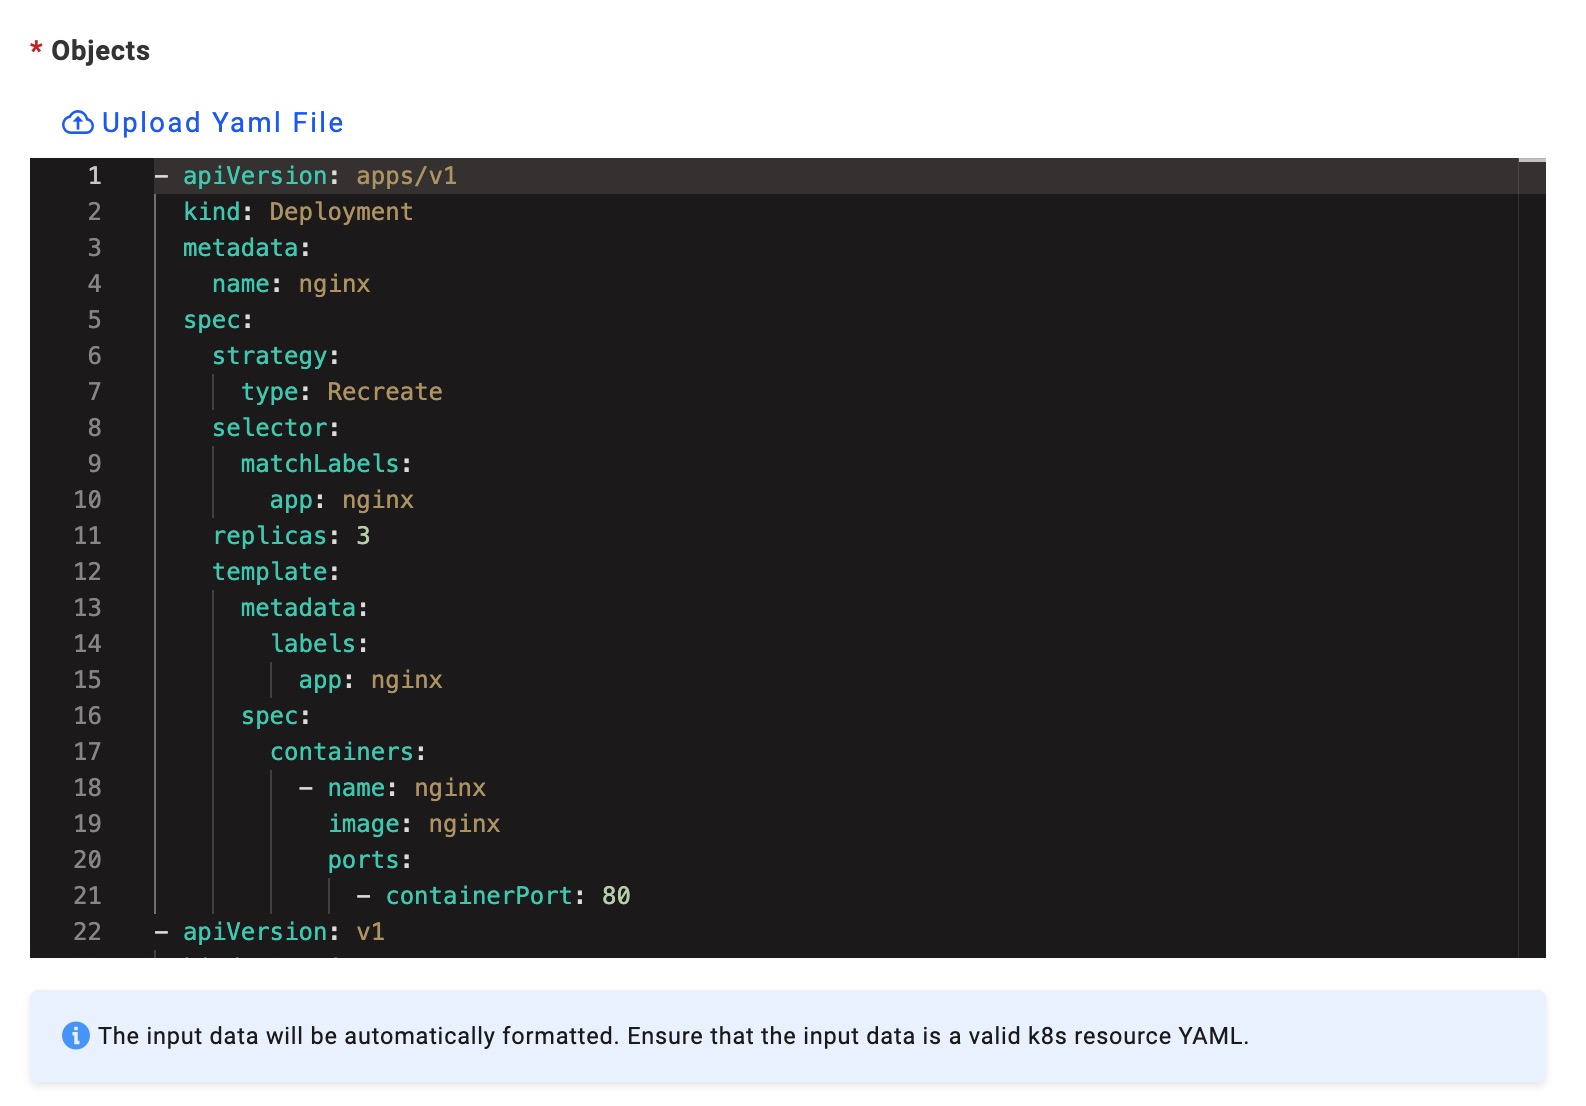
(3) Upload your Yaml file. Note that, the name of the resource you specified must not conflict with existing ones. Also, the editor automatically formats the Yaml file.
After above, click Create to finish.
Deploying test environment
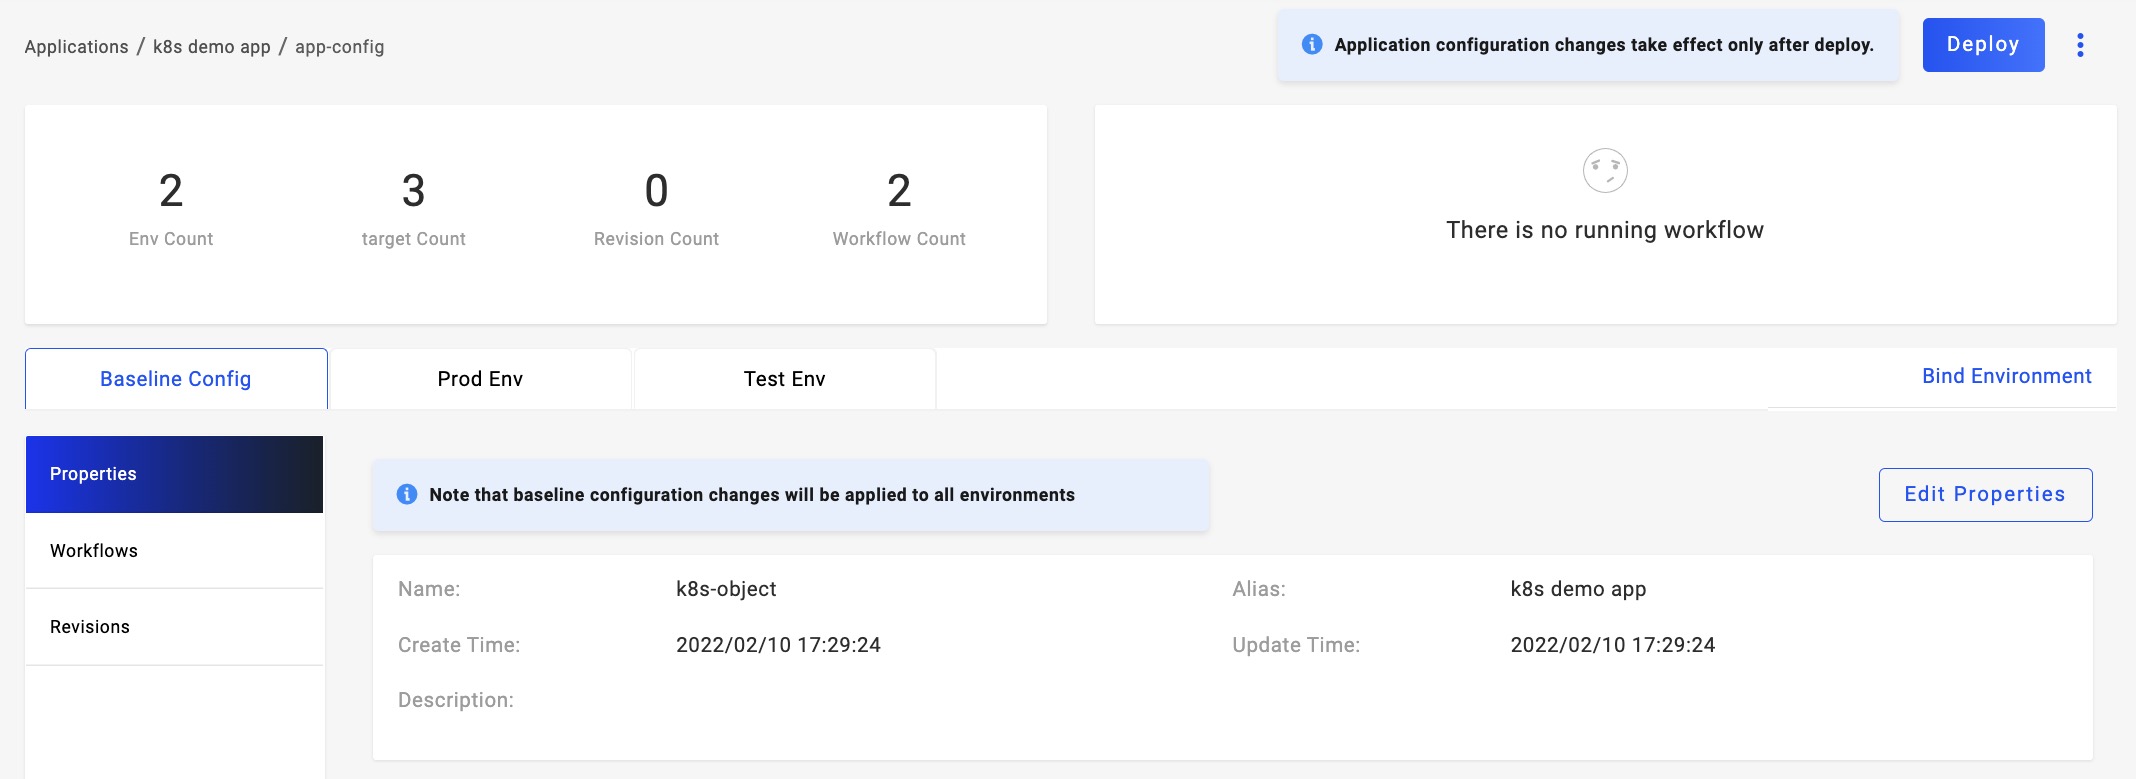
Enter the further page, the application has automatically generated 2 environments and 2 workflows. Each environment has its workflow by default. A workflow consists of one or more steps such as deploy2env.
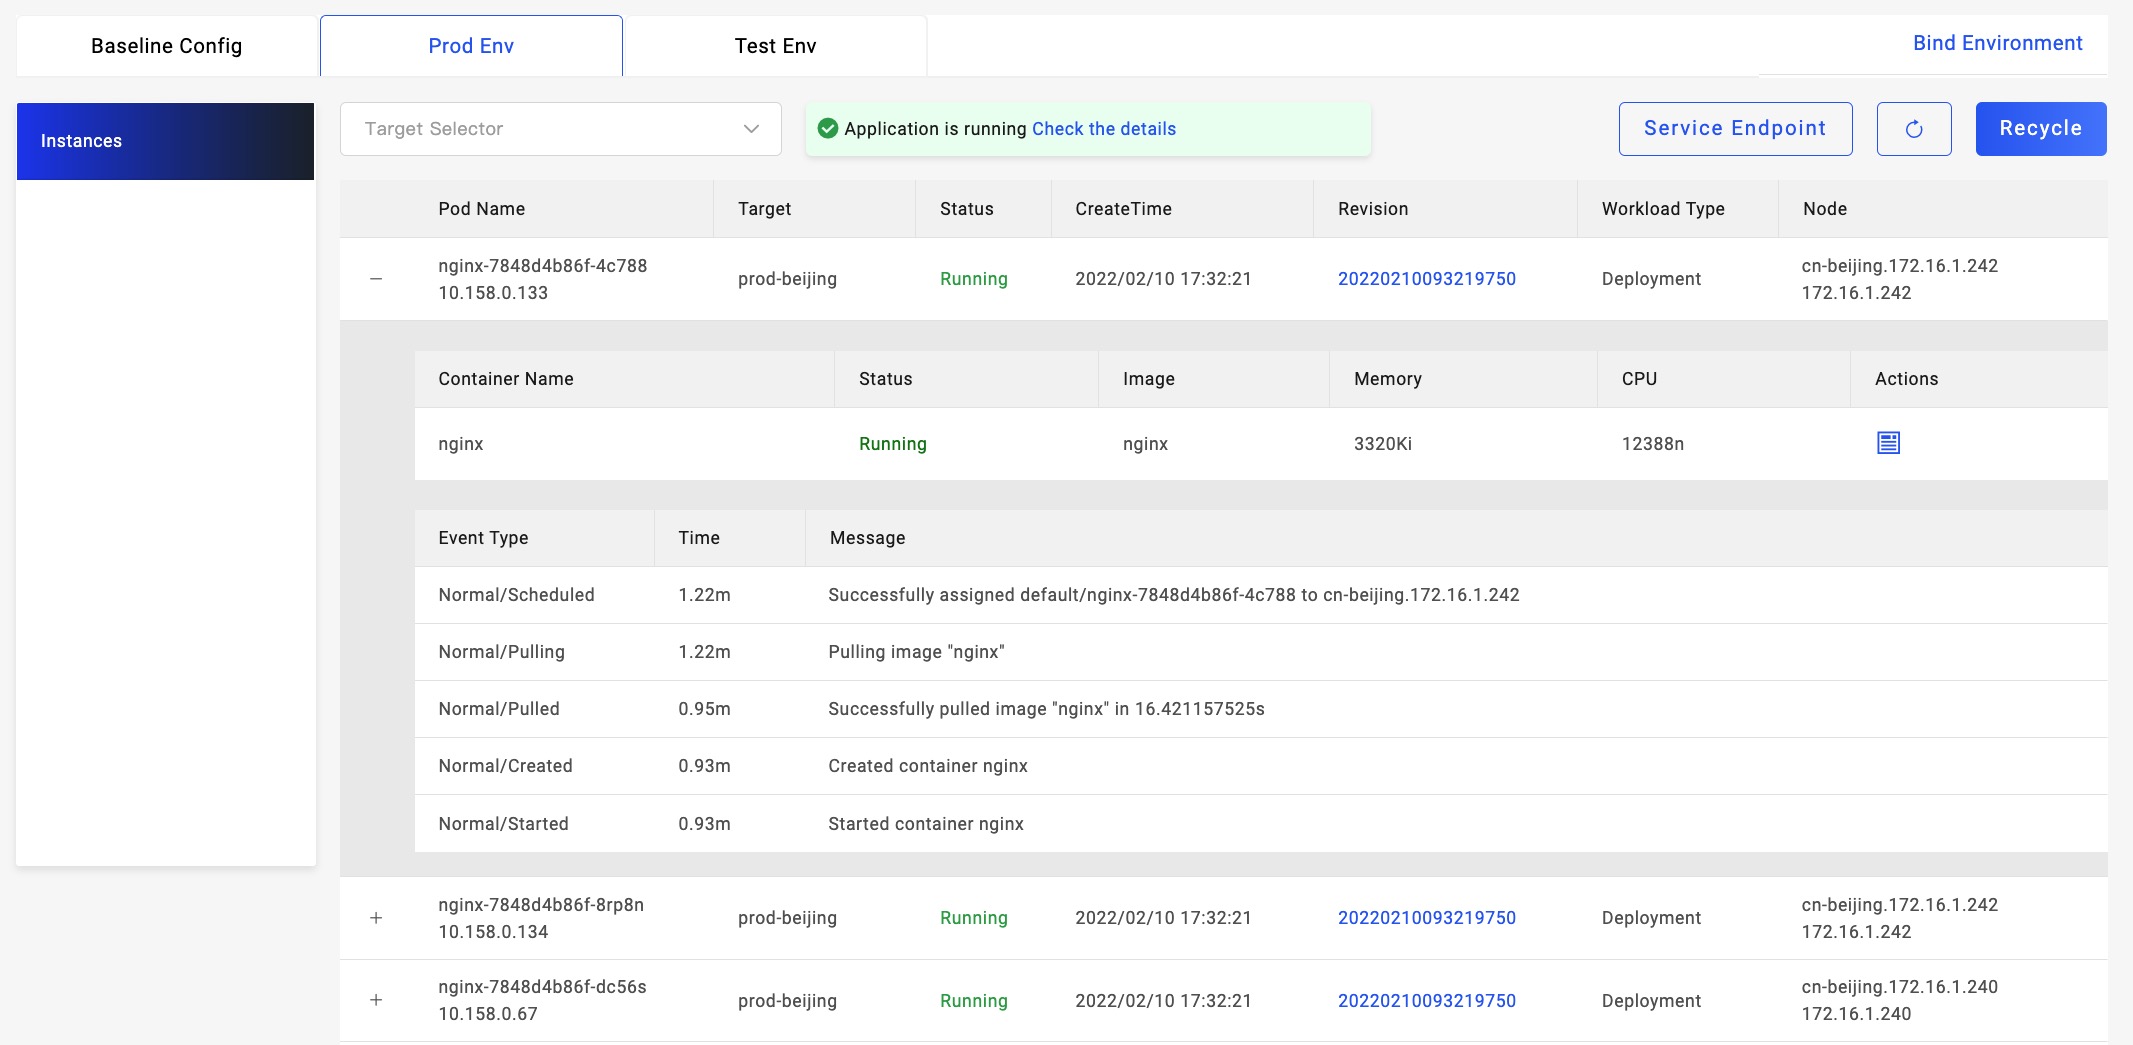
Firstly let's switch to the Tab of the test environment, click Deploy on the page. Since we only assigned one target for the test environment, there's one step for workflow. Looking at the status of its execution in the upper-right, it turns green when succeeded. If it shows red means that workflow went into trouble, you can click on the red sign to look through the detailed reason. Fix it accordingly and the deployment will continue to be regained.
After deployment is finished, refresh the list of instances to see Pods. Click for more if Pod shows abnormality.
As for the test environment, it sure can be updated at any time. When we update the parameters(image, instance), execute the workflow for an upgrade. Note that, choose the workflow for the test environment.

Deploying prod environment
Let's switch to the Tab of the prod environment. It shows that it's not deployed yet. So now you can understand one basic thing for KubeVela, different environments in one application are completely dependant on each other, of each is an individual Application CR.
As we have two targets for the prod environment, it'll execute in sequence. If you hope to set up a manual approval before it gets into the second target, this is where workflow comes in.
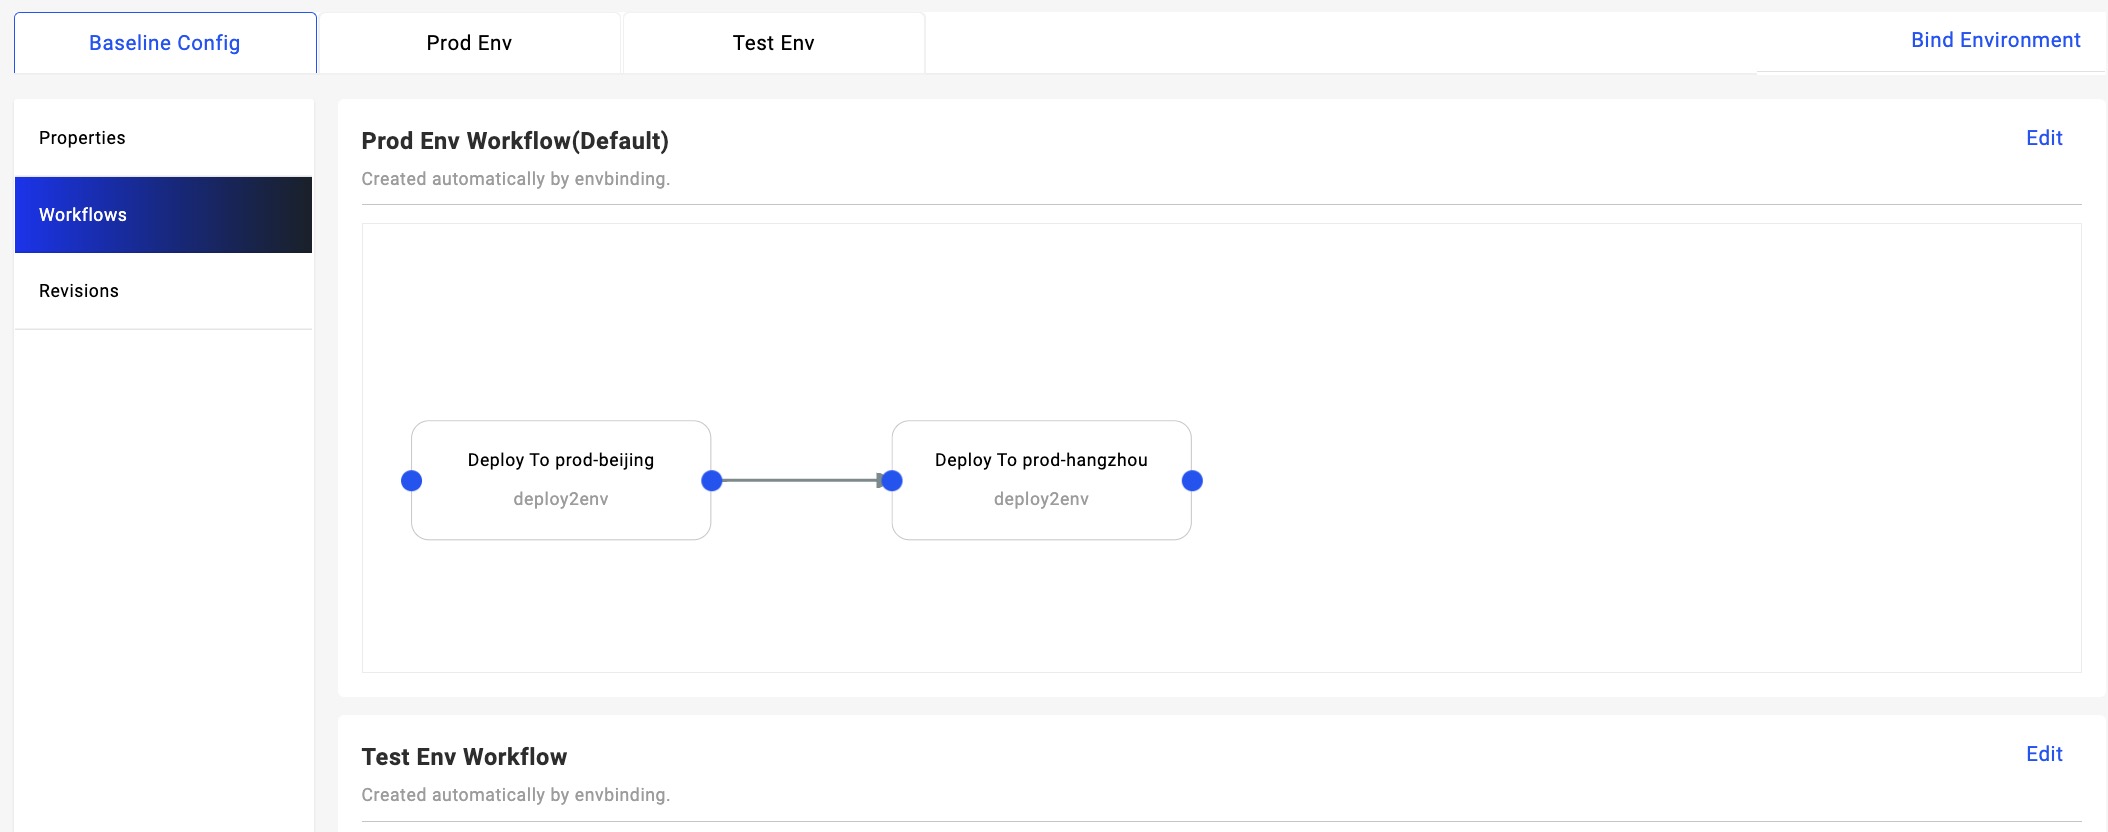
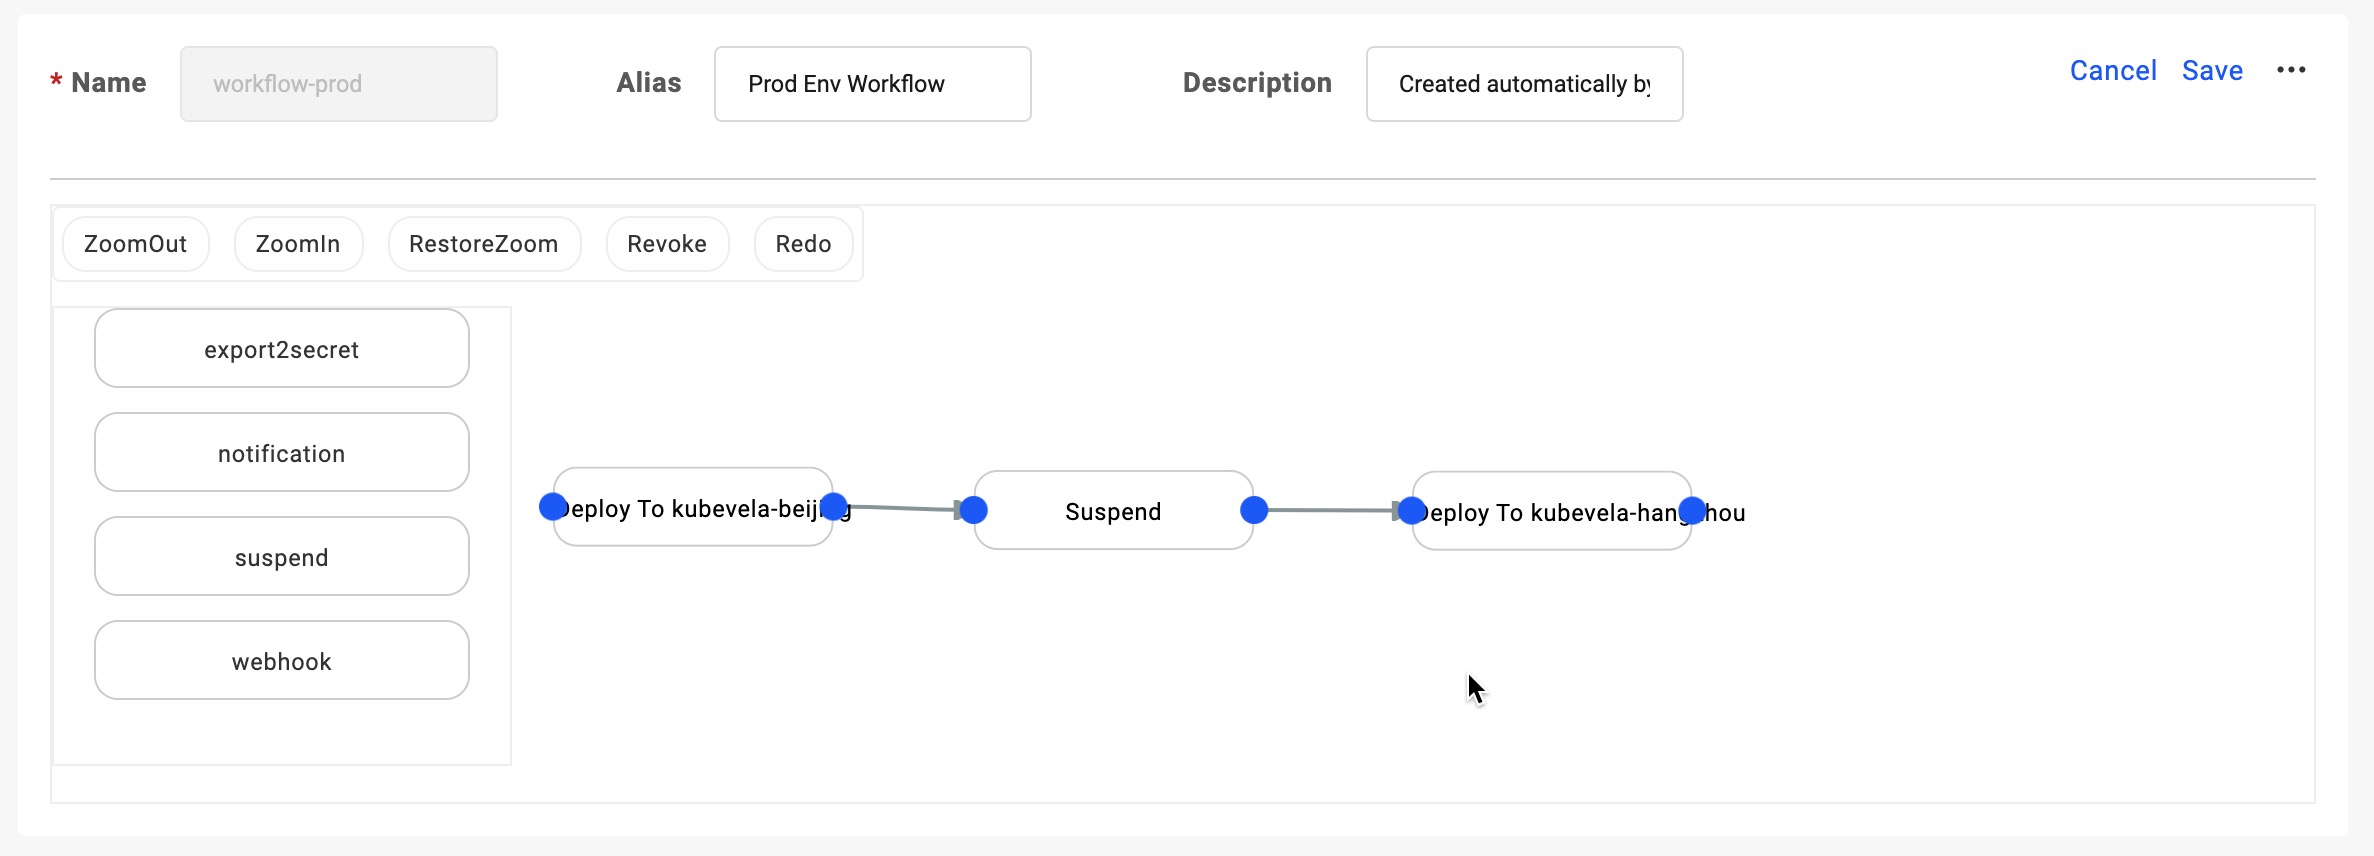
we can see two generated workflow. Now we click the Edit in the workflow of the prod environment, drag out the suspend into the board at the right. Set up the configuration you needed.
Then we need to orchestrate their sequence. First disconnect existing steps (by clicking the line + delete button), connect the suspend step in the middle. After editing, you need to click the Save button on the upper right to save.
Back to the page of prod environment, click Deploy.

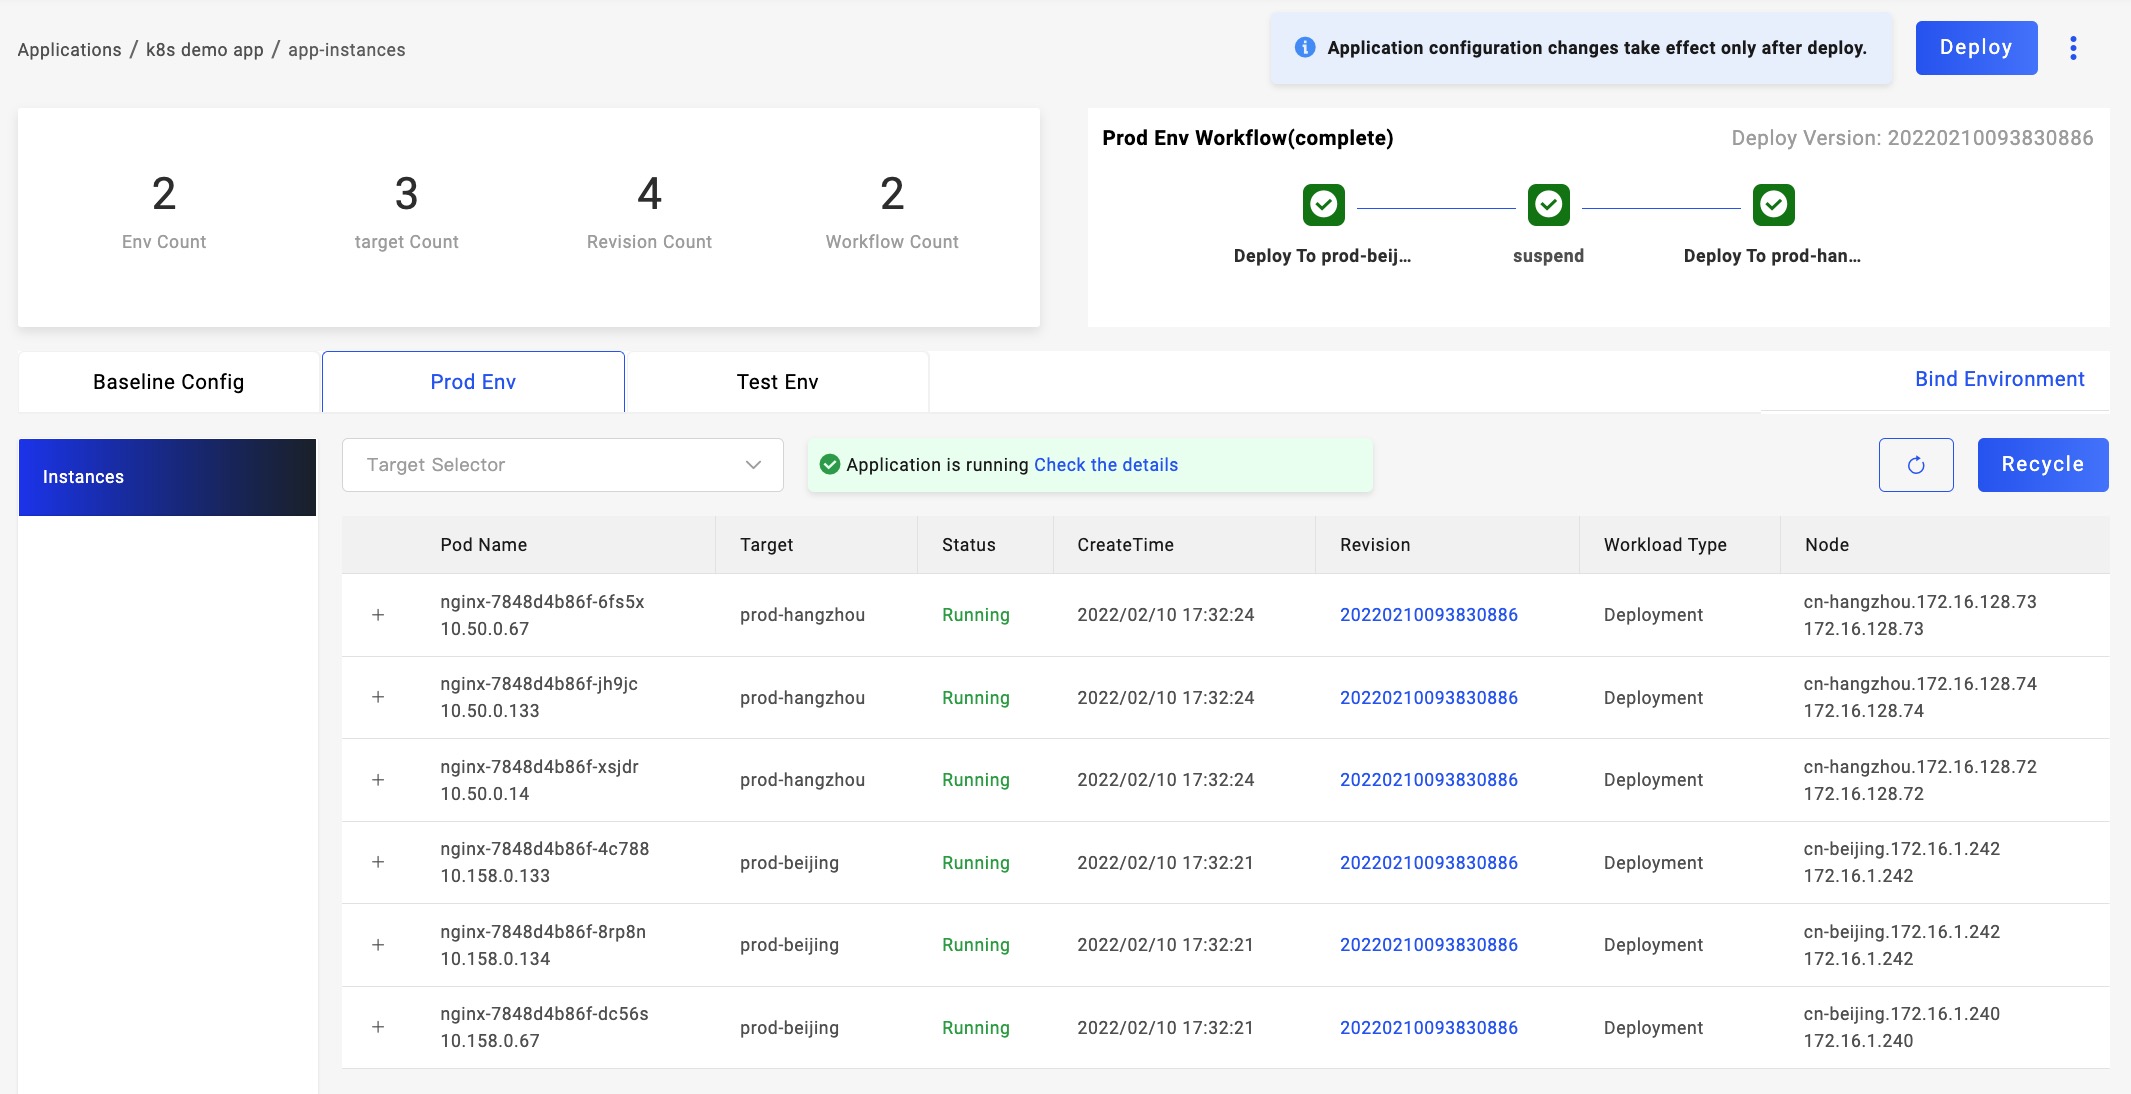
Monitoring the status on the upper right. When the first target finished deploying, a window pops up for you to give out a command.
suspend has three operations:
- Rollback: the revision reverts to the latest one in history, even with the first Target.
- Terminate: stop the deployment process but it will not change the first Target that already deployed.
- Continue: enter the execution of the next step.
If continued, the deployment goes on. In the list of instances, you can check out all the details.
Congrats! Now you've learned how to deploy Kubernetes objects.