At the background of Machine learning goes viral, AI engineers not only need to train and debug their models, but also need to deploy them online to verify how it looks(of course sometimes, this part of the work is done by AI platform engineers. ). It is very tedious and draining AI engineers.
In the cloud-native era, our model training and model serving are also usually performed on the cloud. Doing so not only improves scalability, but also improves resource utility. This is very effective for machine learning scenarios that consume a lot of computing resources.
But it is often difficult for AI engineers to use cloud-native techniques. The concept of cloud native has become more complex over time. Even to deploy a simple model serving on cloud native architecture, AI engineers may need to learn several additional concepts: Deployment, Service, Ingress, etc.
As a simple, easy-to-use, and highly scalable cloud-native application management tool, KubeVela enables developers to quickly and easily define and deliver applications on Kubernetes without knowing any details about the underlying cloud-native infrastructure. KubeVela's rich extensibility extends to AI addons and provide functions such as model training, model serving, and A/B testing, covering the basic needs of AI engineers and helping AI engineers quickly conduct model training and model serving in a cloud-native environment.
This article mainly focus on how to use KubeVela's AI addon to help engineers complete model training and model serving more easily.
KubeVela AI Addon
The KubeVela AI addon is divided into two: model training and model serving. The model training addon is based on KubeFlow's training-operator and can support distributed model training in different frameworks such as TensorFlow, PyTorch, and MXNet. The model serving addon is based on Seldon Core, which can easily use the model to start the model serving, and also supports advanced functions such as traffic distribution and A/B testing.
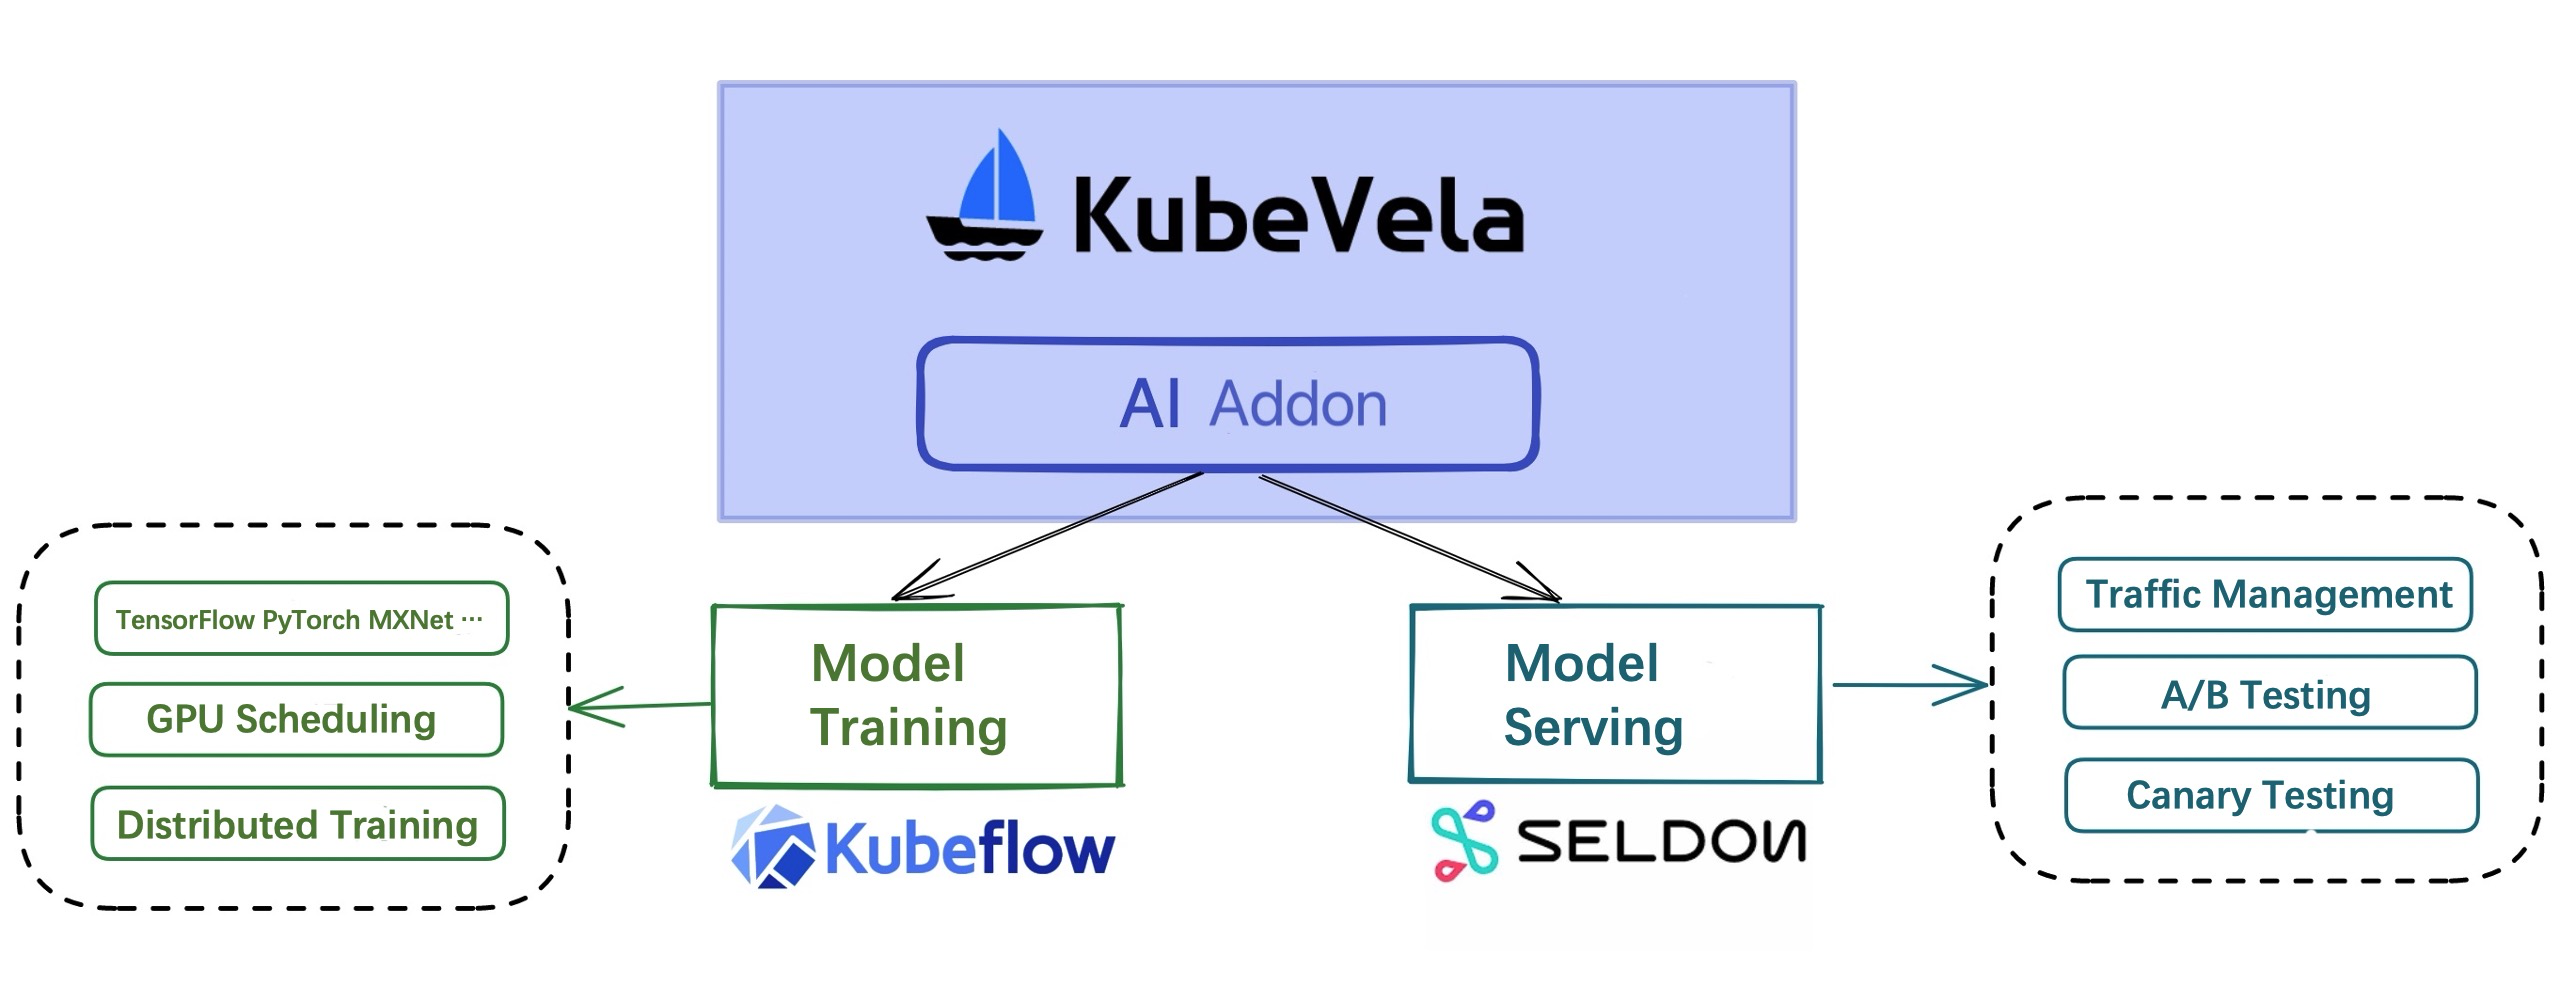
Through the KubeVela AI addon, the deployment of model training and serving tasks can be significantly simplified. At the same time, the process of model training and serving can be combined with KubeVela's own workflow, multi-cluster and other functions to complete production-level services.
Note: You can find all source code and YAML files in KubeVela Samples. If you want to use the model pretrained in this example,
style-model.yamlandcolor-model.yamlin the folder will do that and copy the model into the PVC.
Model Training
First enable the two addons for model training and model serving.
vela addon enable model-training
vela addon enable model-serving
Model training includes two component types, model-training and jupyter-notebook, and model serving includes the model-serving component type. The specific parameters of these three components can be viewed through the vela show command.
You can also read KubeVela AI Addon Documentation for more information.
vela show model-training
vela show jupyter-notebook
vela show model-serving
Let's train a simple model using the TensorFlow framework that turns gray images into colored ones. Deploy the following YAML file:
Note: The source code for model training comes from: emilwallner/Coloring-greyscale-images
apiVersion: core.oam.dev/v1beta1
kind: Application
metadata:
  name: training-serving
  namespace: default
spec:
  components:
  # Train the model
  - name: demo-training
    type: model-training
    properties:
      # Mirror of the trained model
      image: fogdong/train-color:v1
      # A framework for model training
      framework: tensorflow
      # Declare storage to persist models. Here, the default storage class in the cluster will be used to create the PVC
      storage:
        - name: "my-pvc"
          mountPath: "/model"
At this point, KubeVela will pull up a TFJob for model training.
It's hard to see what's going on just by training the model. Let's modify this YAML file and put the model serving after the model training step. At the same time, because the model serving will directly start the model, and the input and output of the model are not intuitive (ndarray or Tensor), therefore, we deploy a test service to call the service and convert the result into an image.
Deploy the following YAML file:
apiVersion: core.oam.dev/v1beta1
kind: Application
metadata:
  name: training-serving
  namespace: default
spec:
  components:
  # Train the model
  - name: demo-training
    type: model-training
    properties:
      image: fogdong/train-color:v1
      framework: tensorflow
      storage:
        - name: "my-pvc"
          mountPath: "/model"

  # Start the model serving
  - name: demo-serving
    type: model-serving
    # The model serving will start after model training is complete
    dependsOn:
      - demo-training
    properties:
      # The protocol used to start the model serving can be left blank. By default, seldon's own protocol is used.
      protocol: tensorflow
      predictors:
        - name: model
          # The number of replicas for the model serving
          replicas: 1
          graph:
            # model name
            name: my-model
            # model frame
            implementation: tensorflow
            # Model address, the previous step will save the trained model to the pvc of my-pvc, so specify the address of the model through pvc://my-pvc
            modelUri: pvc://my-pvc

  # test model serving
  - name: demo-rest-serving
    type: webservice
    # The test service will start after model training is complete
    dependsOn:
      - demo-serving
    properties:
      image: fogdong/color-serving:v1
      # Use LoadBalancer to expose external addresses for easy to access
      exposeType: LoadBalancer
      env:
        - name: URL
          # The address of the model serving
          value: http://ambassador.vela-system.svc.cluster.local/seldon/default/demo-serving/v1/models/my-model:predict
      ports:
        # Test service port
        - port: 3333
          expose: true
After deployment, check the status of the application with vela ls:
$ vela ls

training-serving        demo-training       model-training          running healthy Job Succeeded   2022-03-02 17:26:40 +0800 CST
├─                      demo-serving        model-serving           running healthy Available       2022-03-02 17:26:40 +0800 CST
└─                      demo-rest-serving   webservice              running healthy Ready:1/1       2022-03-02 17:26:40 +0800 CST
As you can see, the application has started normally. Use vela status <app-name> --endpoint to view the service address of the application.
$ vela status training-serving --endpoint

+---------+-----------------------------------+---------------------------------------------------+
| CLUSTER |     REF(KIND/NAMESPACE/NAME)      |                     ENDPOINT                      |
+---------+-----------------------------------+---------------------------------------------------+
|         | Service/default/demo-rest-serving | tcp://47.251.10.177:3333                          |
|         | Service/vela-system/ambassador    | http://47.251.36.228/seldon/default/demo-serving  |
|         | Service/vela-system/ambassador    | https://47.251.36.228/seldon/default/demo-serving |
+---------+-----------------------------------+---------------------------------------------------+
The application has three service addresses, the first is the address of our test service, the second and third are the addresses of the native model.
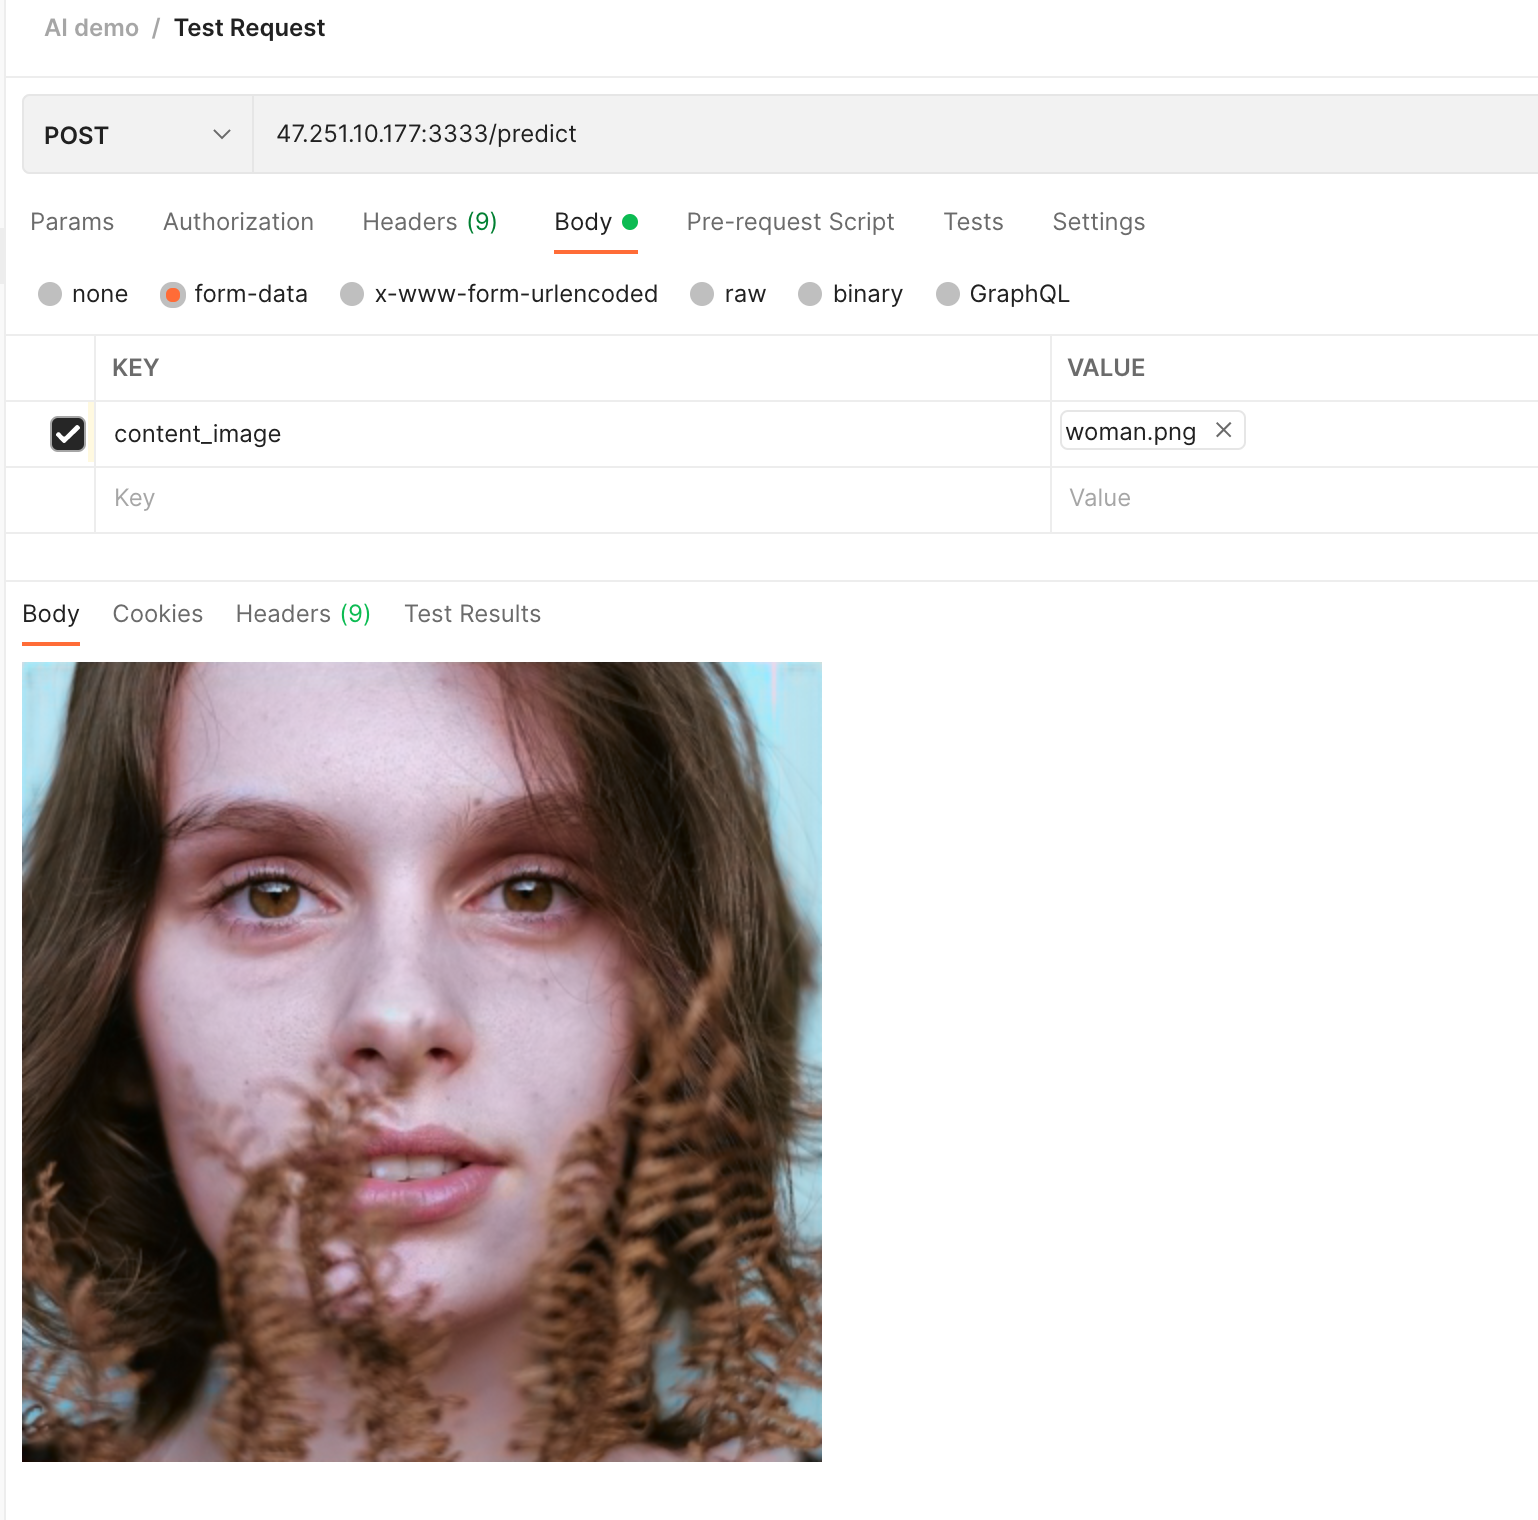
We can call the test service to see the effect of the model: the test service will read the content of the image, convert it into a Tensor and request the model serving, and finally convert the Tensor returned by the model serving into an image to return.
We choose a black and white female image as input:

After the request, you can see that a color image is output:
Model Servings: Canary Testing
In addition to starting the model serving directly, we can also use multiple versions of the model in one model serving and assign different traffic to them for canary testing.
Deploy the following YAML, you can see that both the v1 version of the model and the v2 version of the model are set to 50% traffic. Again, we deploy a test service behind the model serving:
apiVersion: core.oam.dev/v1beta1
kind: Application
metadata:
  name: color-serving
  namespace: default
spec:
  components:
  - name: color-model-serving
    type: model-serving
    properties:
      protocol: tensorflow
      predictors:
        - name: model1
          replicas: 1
          # v1 version model traffic is 50
          traffic: 50
          graph:
            name: my-model
            implementation: tensorflow
            # Model address, our v1 version model is stored under the /model/v1 path in the pvc of color-model, so specify the address of the model through pvc://color-model/model/v1
            modelUri: pvc://color-model/model/v1
        - name: model2
          replicas: 1
          # v2 version model traffic is 50
          traffic: 50
          graph:
            name: my-model
            implementation: tensorflow
            # Model address, our v2 version model is stored under the /model/v2 path in the pvc of color-model, so specify the address of the model through pvc://color-model/model/v2
            modelUri: pvc://color-model/model/v2
  - name: color-rest-serving
    type: webservice
    dependsOn:
      - color-model-serving
    properties:
      image: fogdong/color-serving:v1
      exposeType: LoadBalancer
      env:
        - name: URL
          value: http://ambassador.vela-system.svc.cluster.local/seldon/default/color-model-serving/v1/models/my-model:predict
      ports:
        - port: 3333
          expose: true
When the model deployment is complete, use vela status <app-name> --endpoint to view the address of the model serving:
$ vela status color-serving --endpoint

+---------+------------------------------------+----------------------------------------------------------+
| CLUSTER |      REF(KIND/NAMESPACE/NAME)      |                         ENDPOINT                         |
+---------+------------------------------------+----------------------------------------------------------+
|         | Service/vela-system/ambassador     | http://47.251.36.228/seldon/default/color-model-serving  |
|         | Service/vela-system/ambassador     | https://47.251.36.228/seldon/default/color-model-serving |
|         | Service/default/color-rest-serving | tcp://47.89.194.94:3333                                  |
+---------+------------------------------------+----------------------------------------------------------+
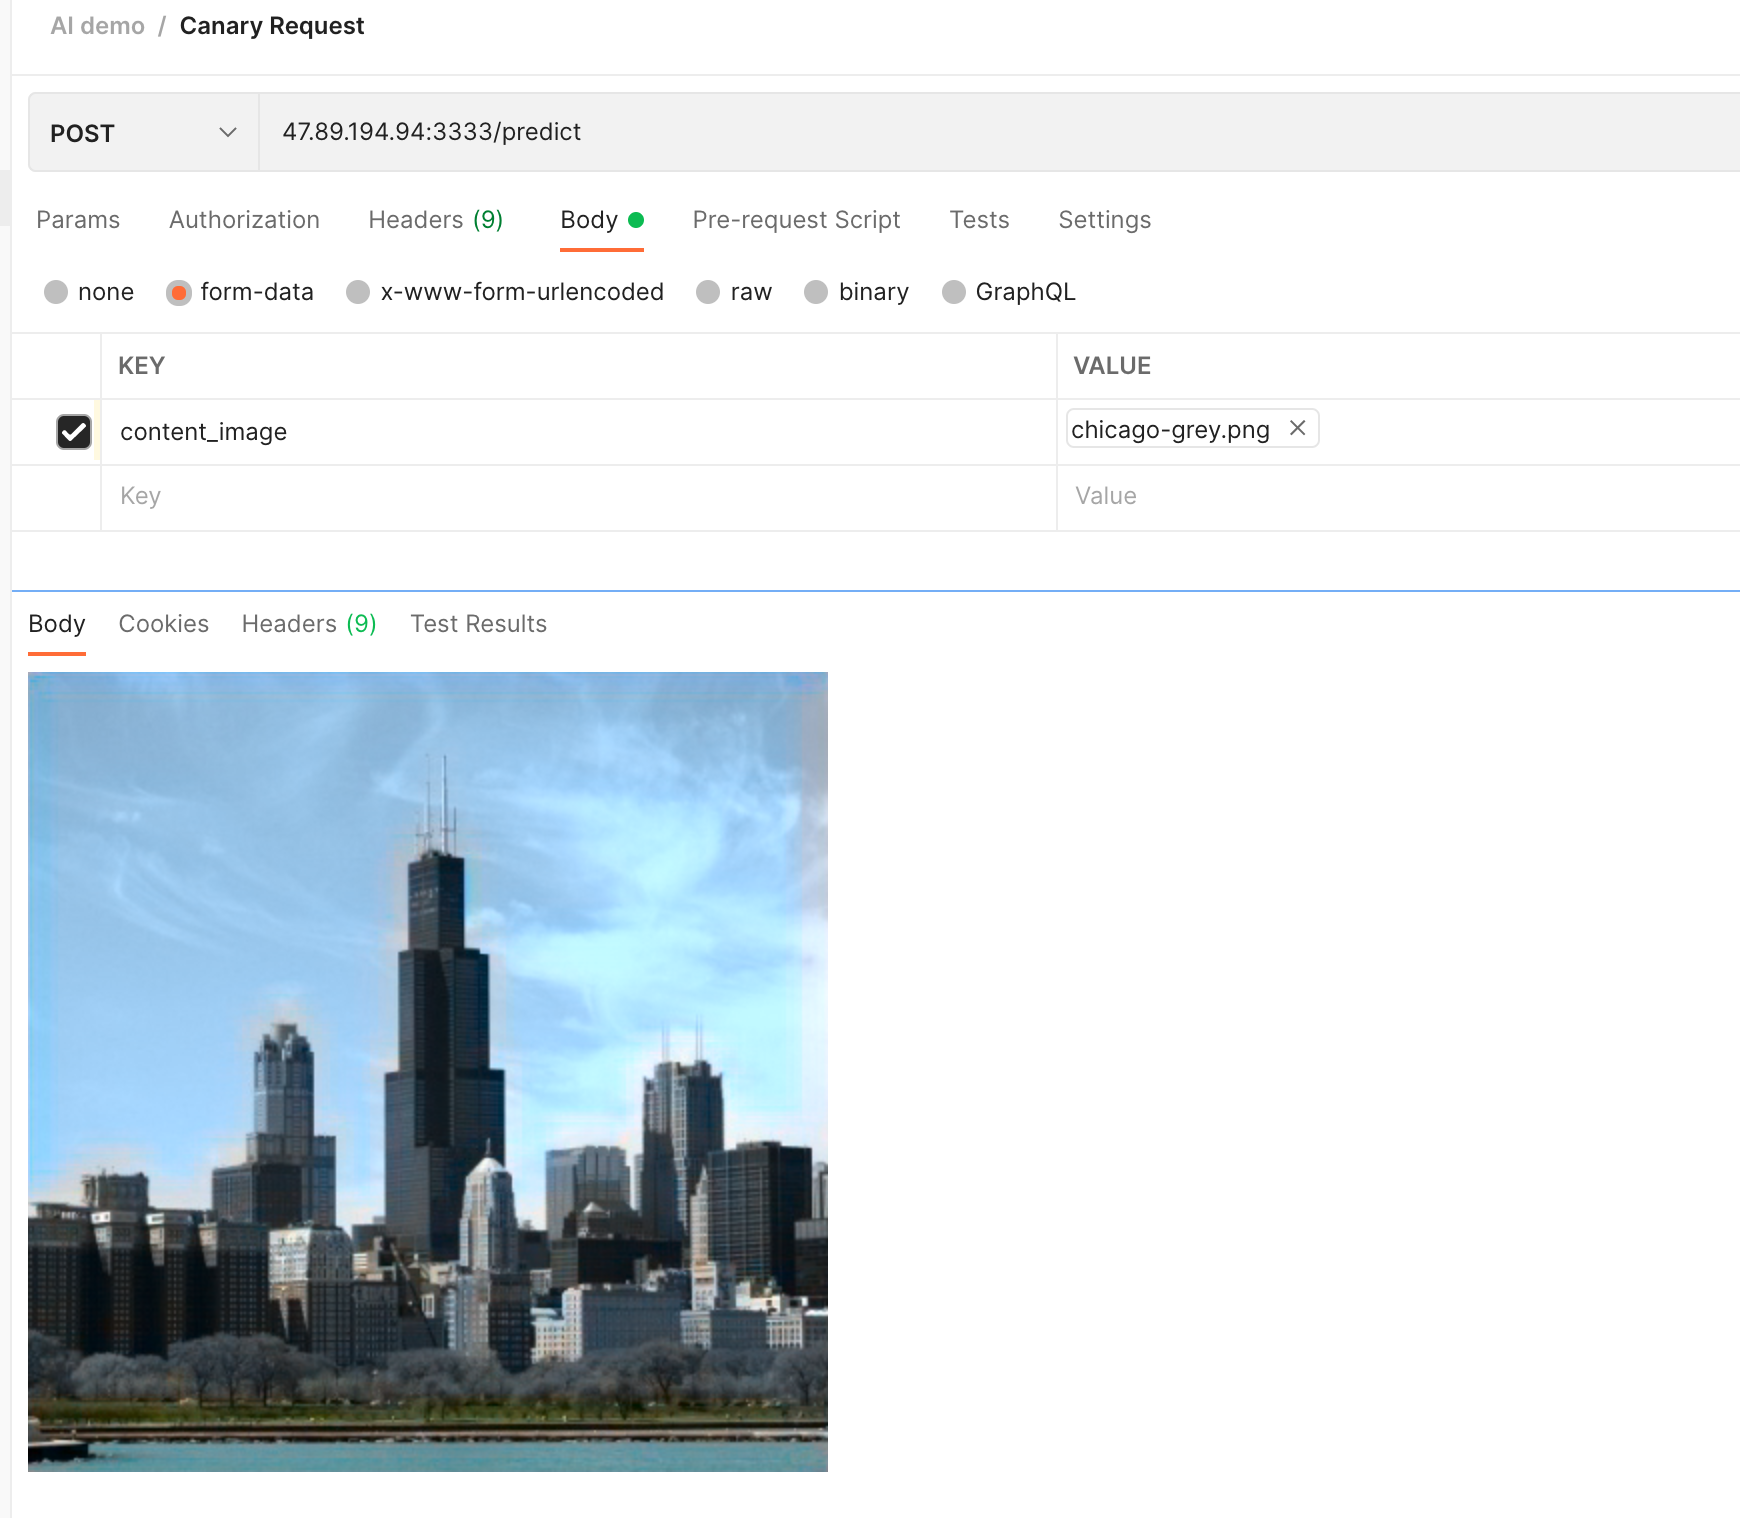
Request the model with a black and white city image:

As you can see, the result of the first request is as follows. While the sky and ground are rendered in color, the city itself is black and white:
Request again, you can see that in the result of this request, the sky, ground and city are rendered in color:
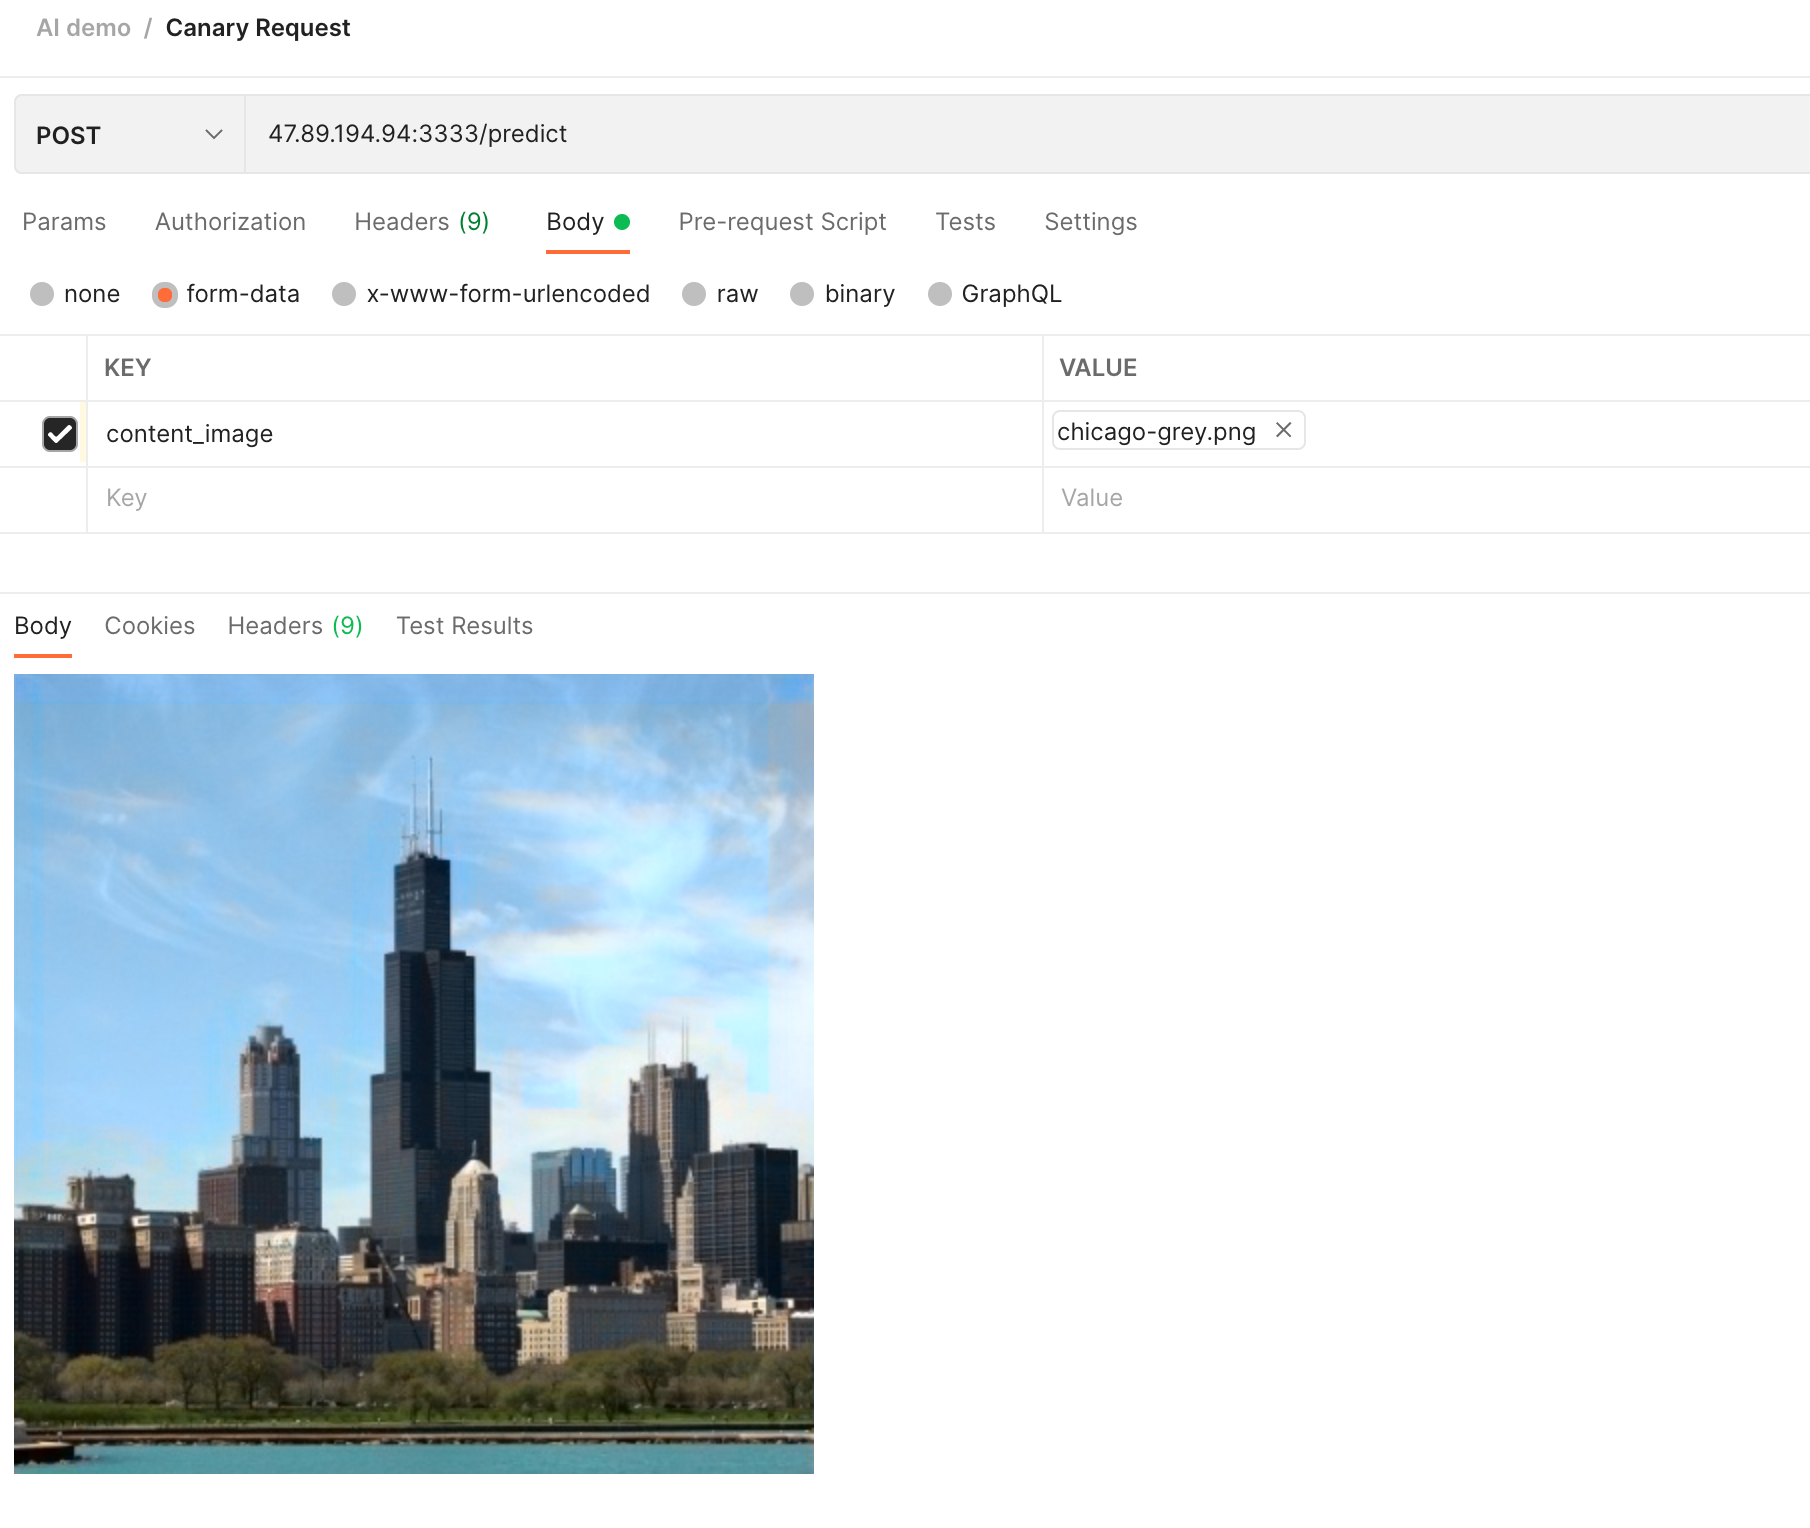
By distributing traffic to different versions of the model, it can help us better judge the model results.
Model Serving: A/B Testing
For a black and white image, we can turn it into color through the model. Or in another way, we can transfer the style of the original image by uploading another style image.
Do our users love colorful pictures more or pictures of different styles more? We can explore this question by conducting A/B testing.
Deploy the following YAML, by setting customRouting, forward the request with style: transfer in the Header to the model of style transfer. At the same time, make this style transfer model share the same address as the colorized model.
Note: The model for style transfer comes from TensorFlow Hub
apiVersion: core.oam.dev/v1beta1
kind: Application
metadata:
  name: color-style-ab-serving
  namespace: default
spec:
  components:
  - name: color-ab-serving
    type: model-serving
    properties:
      protocol: tensorflow
      predictors:
        - name: model1
          replicas: 1
          graph:
            name: my-model
            implementation: tensorflow
            modelUri: pvc://color-model/model/v2
  - name: style-ab-serving
    type: model-serving
    properties:
      protocol: tensorflow
      # The model of style migration takes a long time, set the timeout time so that the request will not be timed out
      timeout: "10000"
      customRouting:
        # Specify custom Header
        header: "style: transfer"
        # Specify custom routes
        serviceName: "color-ab-serving"
      predictors:
        - name: model2
          replicas: 1
          graph:
            name: my-model
            implementation: tensorflow
            modelUri: pvc://style-model/model
  - name: ab-rest-serving
    type: webservice
    dependsOn:
      - color-ab-serving
      - style-ab-serving
    properties:
      image: fogdong/style-serving:v1
      exposeType: LoadBalancer
      env:
        - name: URL
          value: http://ambassador.vela-system.svc.cluster.local/seldon/default/color-ab-serving/v1/models/my-model:predict
      ports:
        - port: 3333
          expose: true
After successful deployment, view the address of the model serving through vela status <app-name> --endpoint:
$ vela status color-style-ab-serving --endpoint

+---------+---------------------------------+-------------------------------------------------------+
| CLUSTER |    REF(KIND/NAMESPACE/NAME)     |                       ENDPOINT                        |
+---------+---------------------------------+-------------------------------------------------------+
|         | Service/vela-system/ambassador  | http://47.251.36.228/seldon/default/color-ab-serving  |
|         | Service/vela-system/ambassador  | https://47.251.36.228/seldon/default/color-ab-serving |
|         | Service/vela-system/ambassador  | http://47.251.36.228/seldon/default/style-ab-serving  |
|         | Service/vela-system/ambassador  | https://47.251.36.228/seldon/default/style-ab-serving |
|         | Service/default/ab-rest-serving | tcp://47.251.5.97:3333                                |
+---------+---------------------------------+-------------------------------------------------------+
In this application, the two services have two addresses each, but the model service address of the second style-ab-serving is invalid because the model service is already pointed to the address of color-ab-serving . Again, we see how it works by requesting the test service.
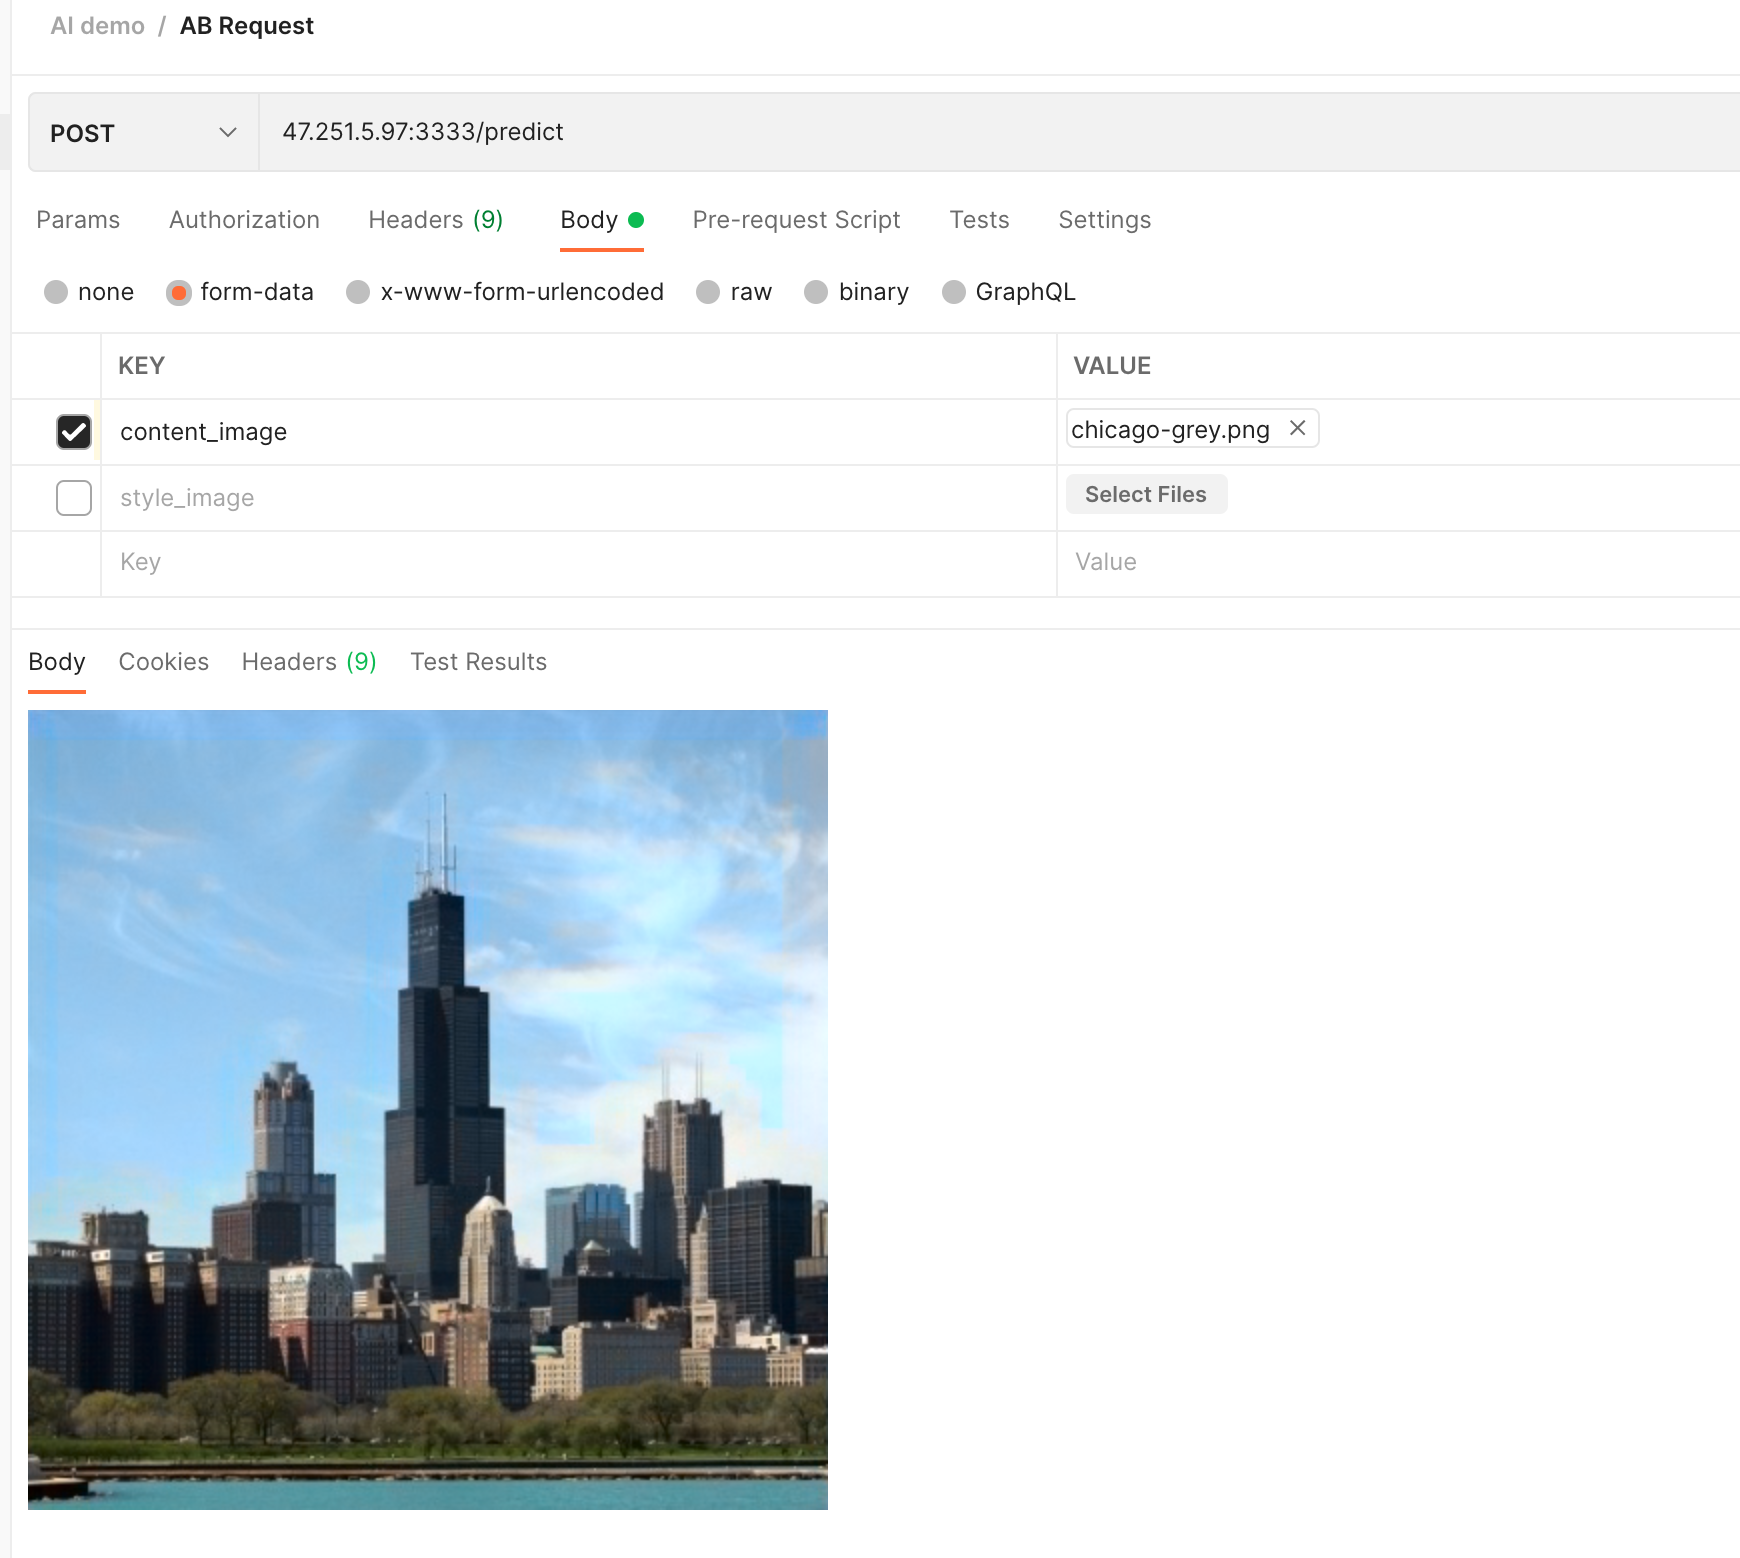
First, without the header, the image changes from black and white to color:
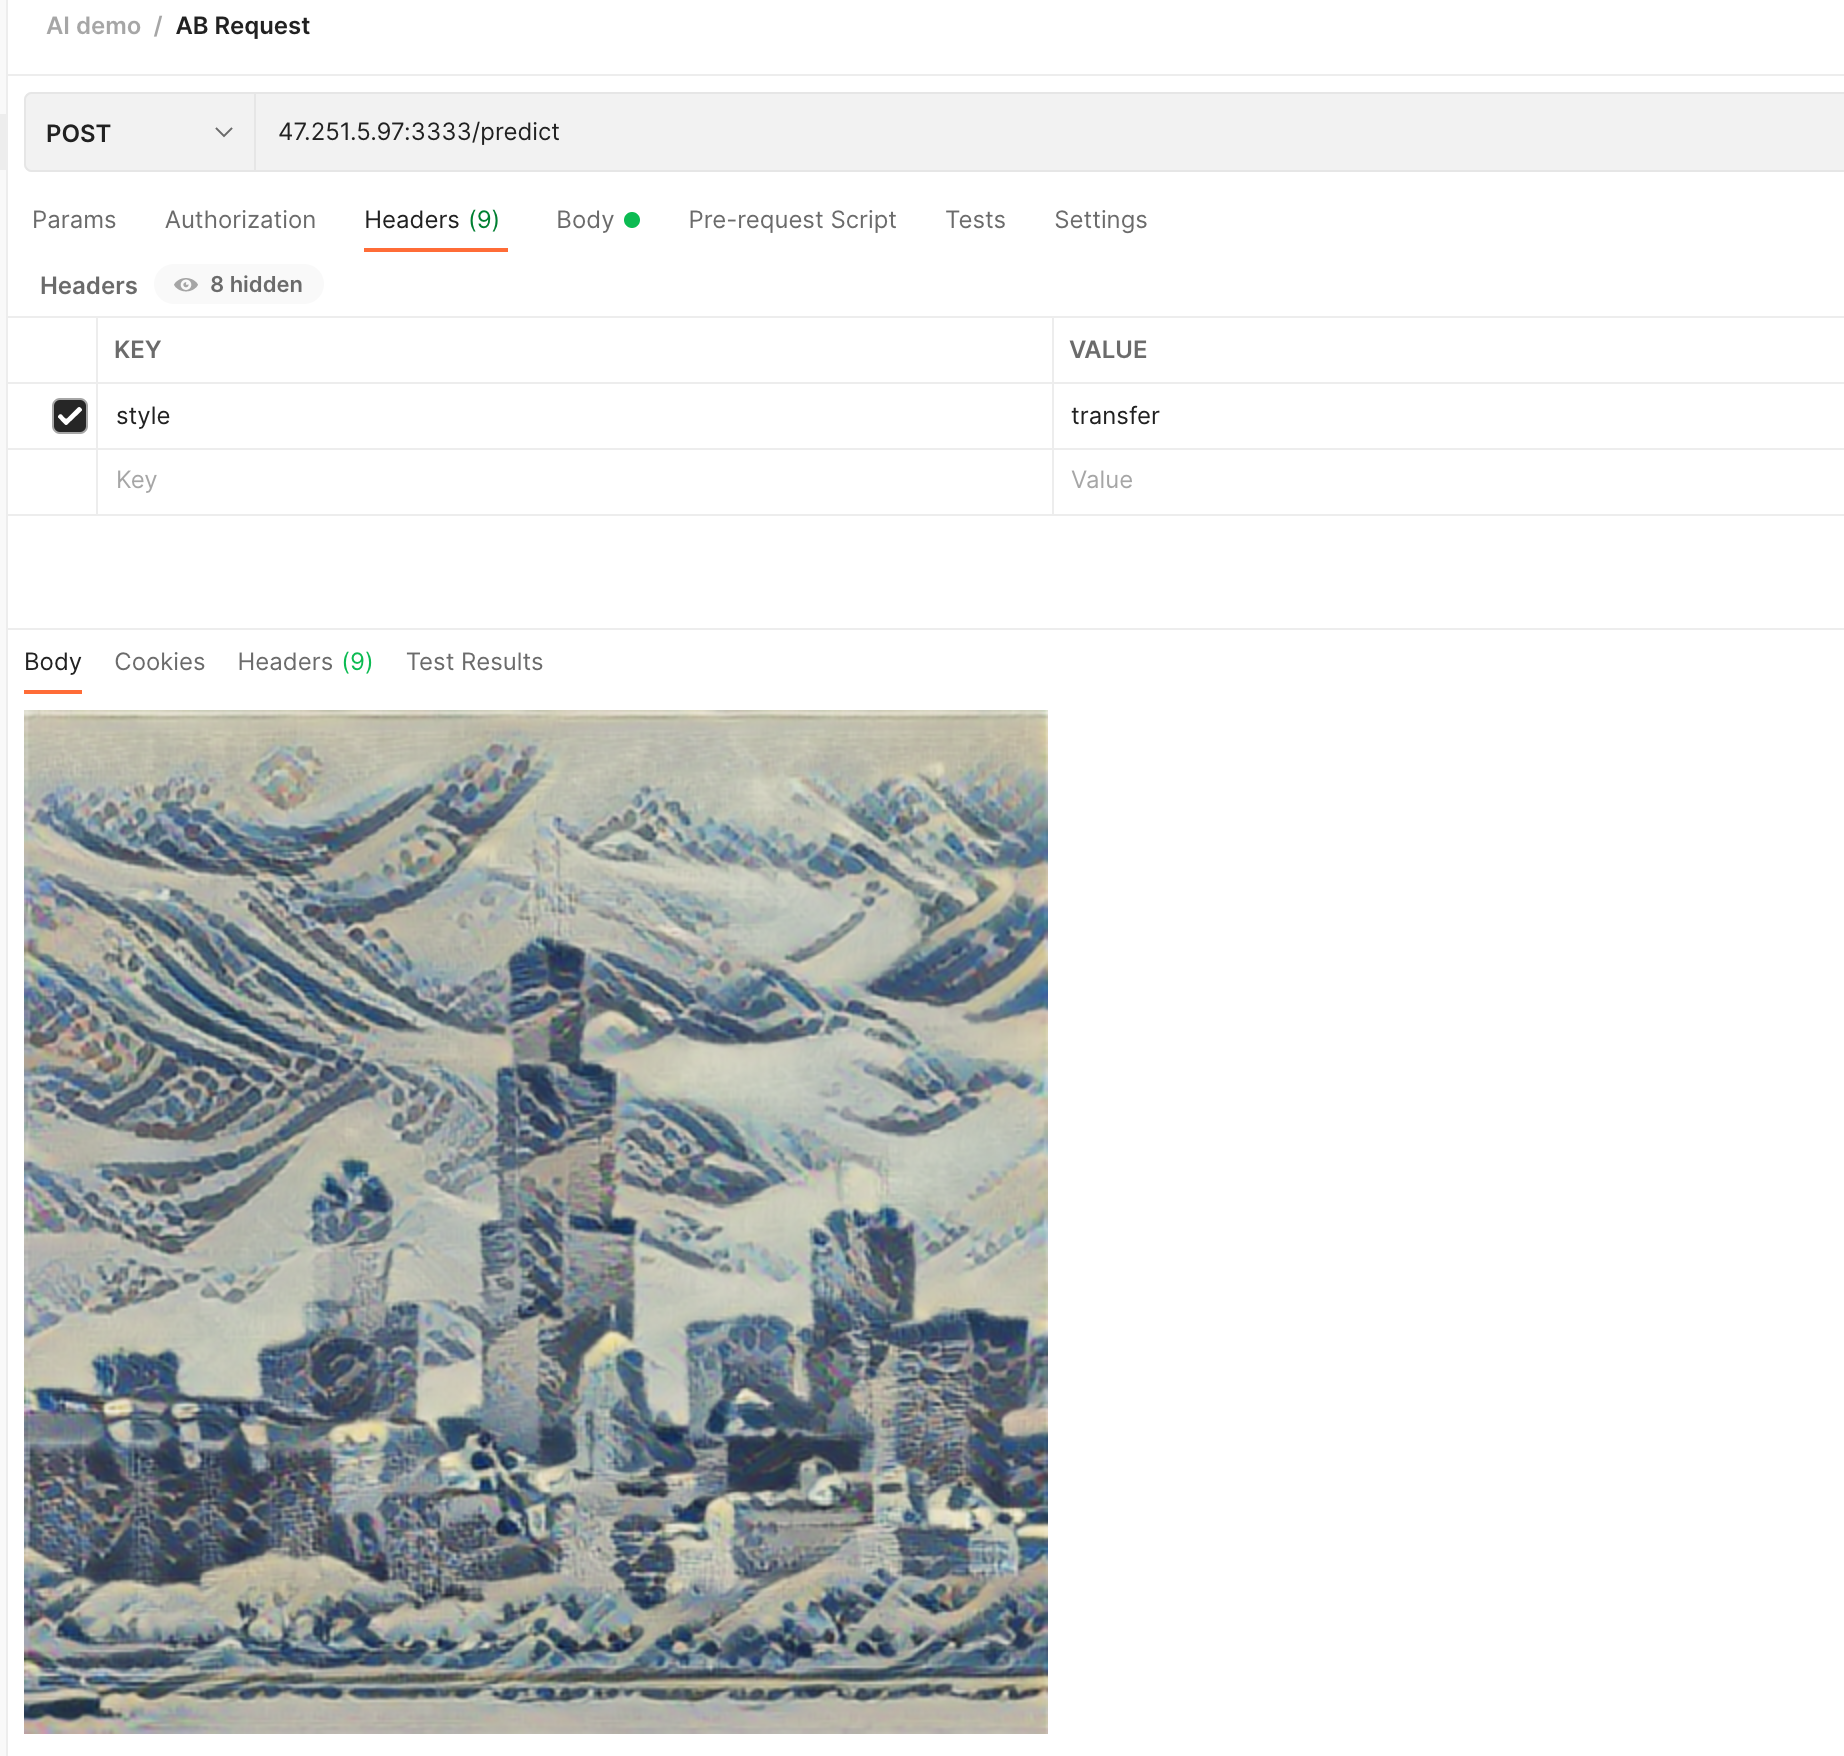
Let's add an image of an ocean wave as a style render:

We add the Header of style: transfer to this request, and you can see that the city has become a wave style:
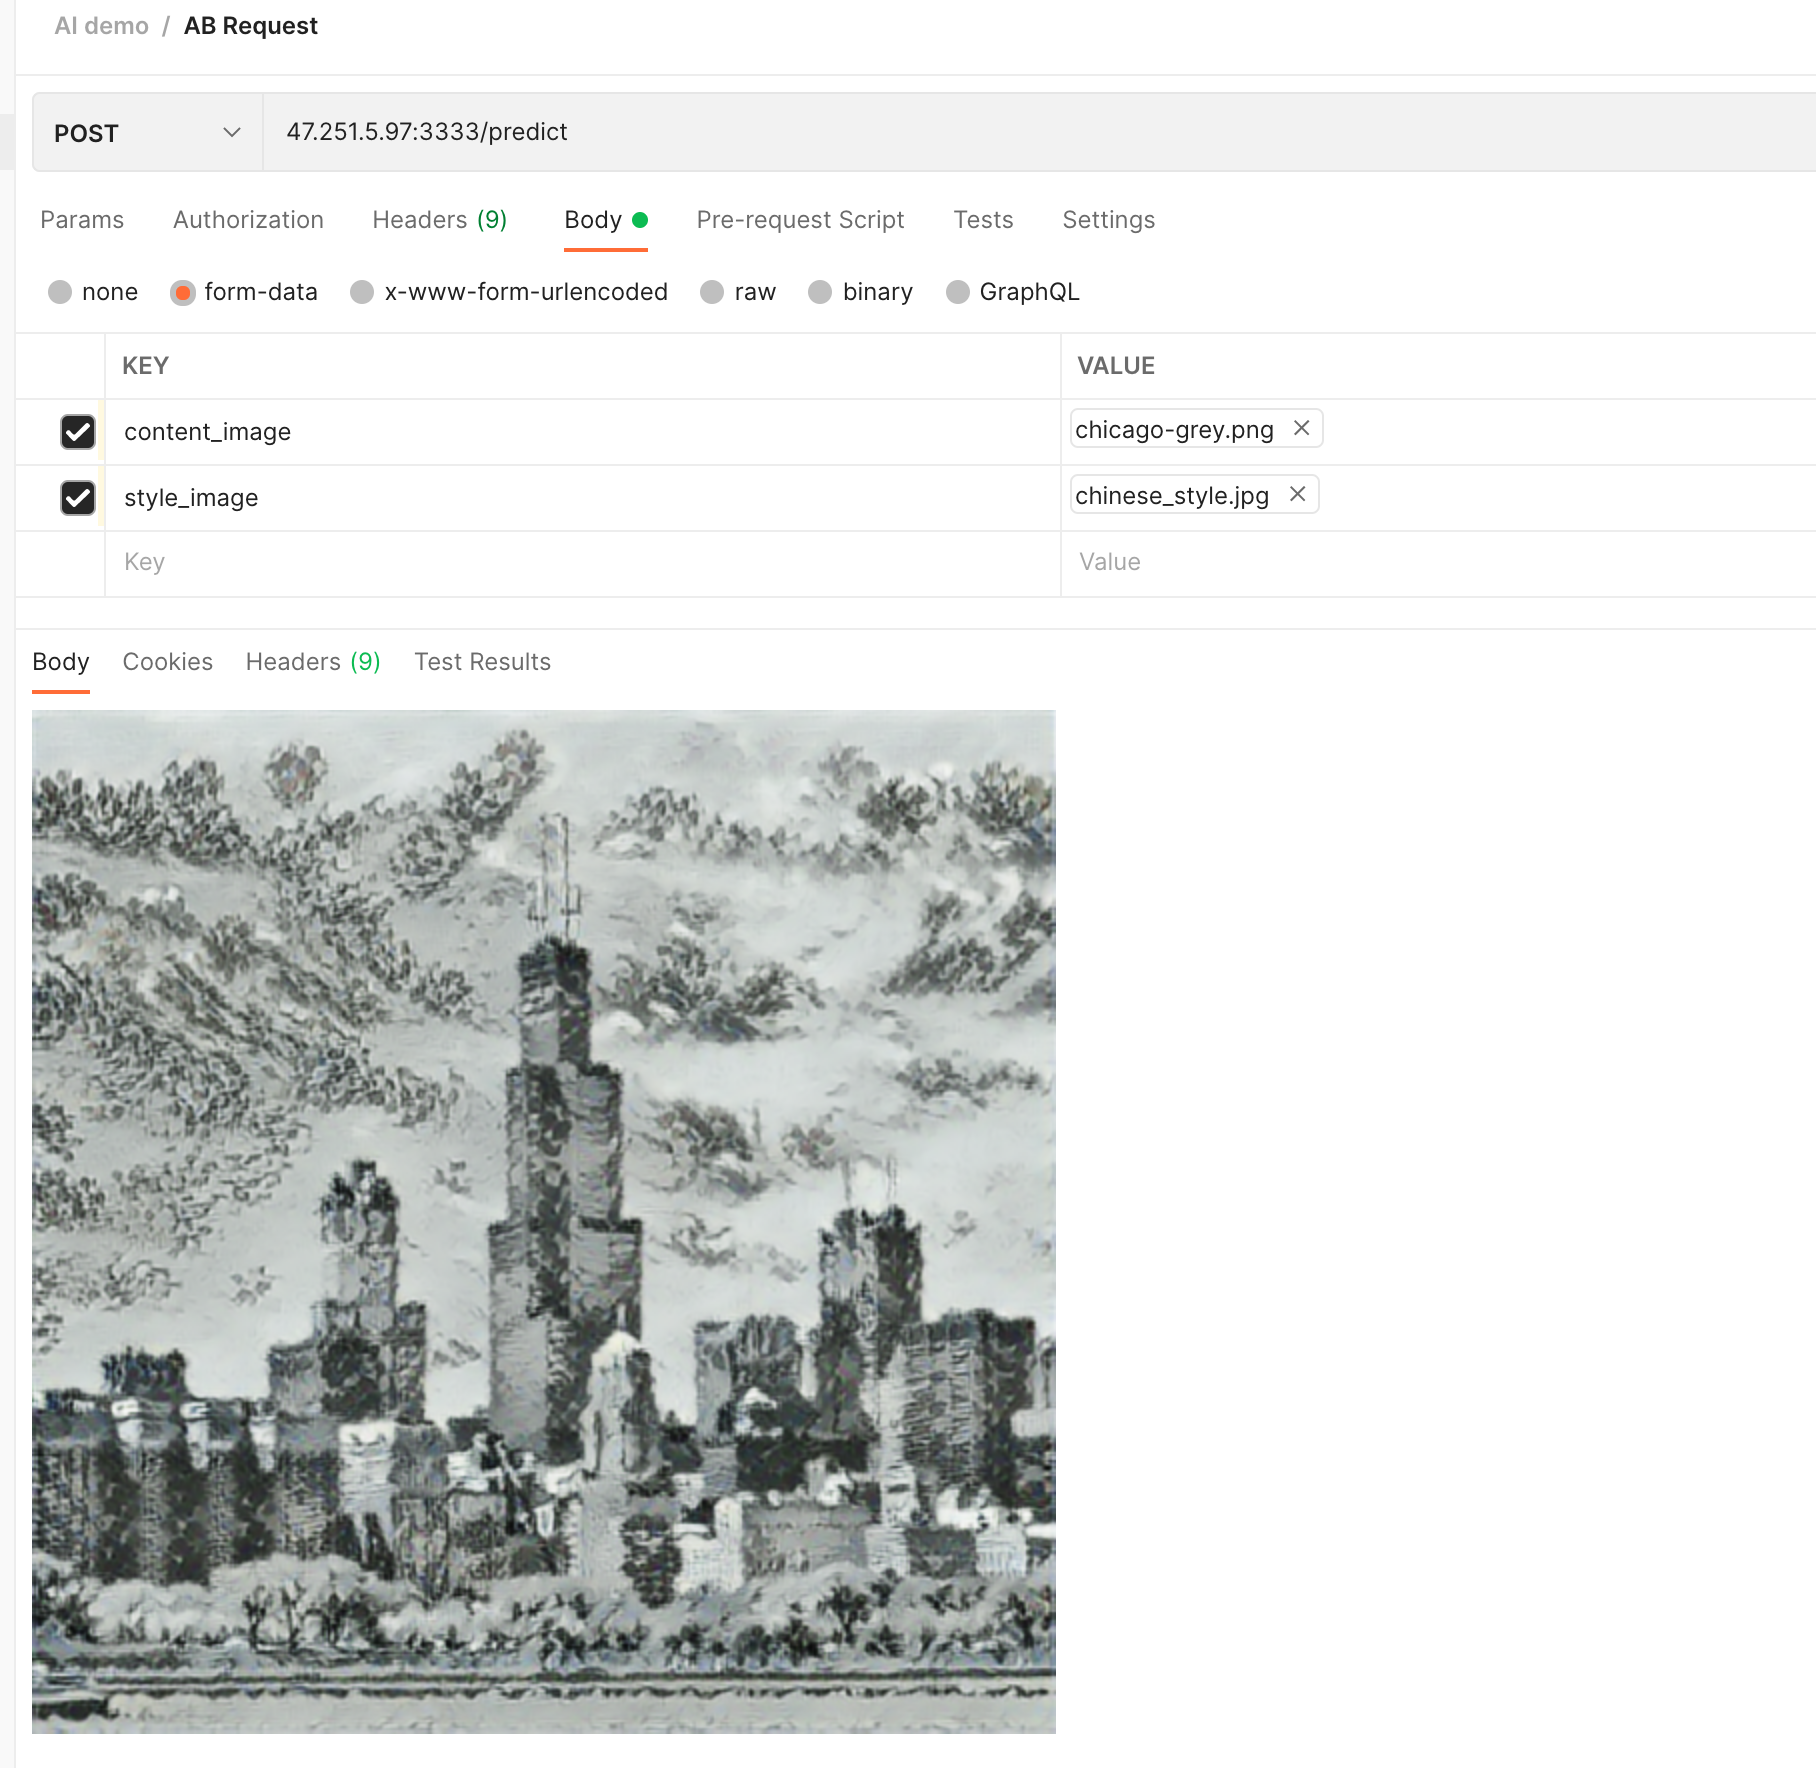
We can also use an ink painting image as a style rendering:

It can be seen that this time the city has become an ink painting style:
Summary
Through KubeVela's AI plug-in, it can help you to perform model training and model serving more conveniently.
In addition, together with KubeVela, we can also deliver the tested model to different environments through KubeVela's multi-environment function, so as to realize the flexible deployment of the model.
